


DIY Solar + Battery Guide: System Planning and Design [2026]
How to Size, Set Up & Maintain Your Own Solar Power System
By the ShopSolar team — built from a decade+ of hands-on experience, 50,000+ kits sold, and thousands of real customer conversations. [Download PDF Version]
Introduction
Solar + battery systems are hard to understand. The electrical terminology can leave you feeling frustrated and have you questioning your own intelligence. (Trust us, we were right there not long ago.) Amps, volts, watts, watt-hours, amp hours, split phase, 120/240 inverter, battery, pure sine wave, monocrystalline — the list of electrical jargon goes on.
On top of that, most people who understand this stuff love using big fancy words and seem to want to make you feel even dumber than you already do. That was our experience early on.
We had no prior electrical experience when first getting into the industry a decade ago, and it took over two years to even begin wrapping our heads around the fundamentals — and that was working with and selling solar and battery systems all day every day.
After speaking with thousands of customers and selling thousands of DIY solar kits, it made sense to put everything we've learned into a single guide that helps you do it yourself.
Here's the truth: you can sum up DIY solar + battery into a handful of math equations and a few basic principles. We promise not to use big fancy words or dive into the scientific backgrounds of each component. Instead, we'll use simple analogies, a handful of equations, and some diagrams to have you sizing the perfect solar system for your needs in less than an hour.
Table of Contents
- How Solar + Battery Works
- How to Size Your System (7 Steps)
- Real-World Examples: Cabin &; RV
- Budget Ranges: What Does Off-Grid Solar Actually Cost?
- Choosing the Right Solar Kit
- LiFePO4 vs. Lithium-Ion: What's the Difference?
- Setting Up & Installing Your System
- Cold Weather & Winter Performance
- Shading: The Silent Killer of Solar Production
- Maintenance & System Care
- Applications & Insights
- How to Buy: The Right Decision Sequence
- Appendix A: Load Calculation Worksheet
- Appendix B: Wiring a Battery Bank
- Appendix C: Grid-Tie vs. Off-Grid Solar
- Appendix D: Solar Generator Wiring Diagram
- Appendix E: Custom Solar Kit Schematic
- Appendix F: Parts Lists by System Type
1. How Off-Grid Solar Works
Before we get into sizing equations, let's make sure the concept clicks. Here are two analogies born from thousands of customer phone calls.
The Bathtub Analogy
Think of your battery bank as a bathtub. It holds power the same way a bathtub holds water.
Your solar panels are the faucets — the only way to fill it up (other than a backup fuel generator). Solar panel arrays are sized in watts (W) or kilowatts (kW). Batteries are sized in watt-hours (Wh) or kilowatt-hours (kWh).
The sun only shines effectively for about six hours every day, so your panels have a limited window to collect power. After 5–6pm, the flow stops and you can only use what you collected during the day.
Every evening you need to use that stored power carefully — making sure there's enough left in the morning to run your appliances until the sun comes back up and starts filling your battery again.
In an ideal world, your solar array is large enough that your battery is full or overflowing by 2–3pm every day. That gives you more than enough power to get through the night.
The more you're willing to spend, the bigger the tub you can get — from a bathtub, to a hot tub, to a swimming pool. And the bigger the tub, the bigger the faucets you need to fill it during the day. The same logic applies to solar generator kits and custom solar systems.

The Bank Account Analogy
You can also think of your battery bank like a bank account. Your solar panels earn the deposits — the only way to get power in. (A backup generator works too.)
Again, your panels only have about six good hours a day to generate income. The more panels you have, the more money you make per hour.
After 5–6pm, the deposits stop. You have to live on what you earned during the day, spending it carefully so you have enough left in the morning. Your goal: have a big enough array that your account is full or overflowing by 2–3pm every day.

2. How to Size Your Solar System
Sizing any solar system comes down to three numbers:
- Inverter Size
- Battery Bank Size
- Solar Array Size
Using the seven steps below, you can calculate all three in about 20–30 minutes. Grab a pen and paper and follow along.
Step 1 — Amps × Volts = Watts
You need this equation to find the watt draw of each appliance you want to run. Most appliances list their amps and/or volts on a sticker. If an appliance only lists amps and plugs into a standard wall outlet, assume 120V.
Dryers, ovens, well pumps, and similar heavy appliances are typically 240V — you can tell by the large, unusual plug shape.
Step 2 — Total Average Hourly Load in Watts (TAHL)
Add up the watt draw of every appliance you want to run off solar. Only count appliances that run for more than five minutes at a time — microwaves, toasters, and hair dryers are too brief to meaningfully factor in. You're looking for your average continuous hourly load.
Why? You're calculating the load overnight when you're running purely off stored battery power. After the sun goes down, there's no incoming power — you need to make sure you won't drain your battery two or three hours after sunset.
Example loads to include: fridge, freezer, lights, WiFi router, fans, TV, phone chargers.
Loads to note separately for inverter sizing: well pump, air conditioner (these matter more for inverter size than battery bank size since they don't run all night).
Important notes:
- Most appliances list their maximum load, not their average draw. A fridge label may say 800W but it may only average 100W — a massive difference. Google "[appliance name] average watt draw" for more accurate numbers.
- Typical watt draw range: 100–500W/hour is the watt draw for average homes and cabins.
- See Appendix A for a full load calculation worksheet.
Step 3 — Size Your Battery Bank
Formula: TAHL × Target Run Time in Hours = Battery Bank Size in Watt-Hours (Wh)
Use 18–20 hours as your baseline run time. This covers from when the sun sets (~5–6pm) through to when it rises again (~8–9am).
Example:
- TAHL: 450W
- Target run time: 20 hours
- Battery bank: 450 × 20 = 9,000Wh (9kWh)
Adjust the run time multiplier to fit your situation:
- Light users (a light or two at night): 8–10 hours
- Standard household overnight: 18–20 hours
- Want heavy backup buffer: 40–50 hours
Note on running AC overnight: A 15,000 BTU air conditioner draws ~1,000W per hour. Running it for 8 hours = 8kWh just for the AC — factor this in separately if needed.
Step 4 — Understand Watt-Hours vs. Kilowatt-Hours
- Watts (W) = moving power — consumption or generation at a single point in time
- Watt-hours (Wh) = stored power — energy over a period of time
- Kilowatt-hours (kWh) = 1,000 watt-hours
When there's an "h" at the end, it's stored energy. When there's no "h," it's just watts — power in motion. Battery capacity is measured in watt-hours or kilowatt-hours. Your electricity bill is measured in kWh — same unit.
Step 5 — Size Your Solar Panel Array
Formula: Battery Bank Size in Wh ÷ Target Recharge Time in Hours = Solar Array Size in Watts
Use 6 hours as your baseline recharge target. Most of the US gets no more than 6 good peak sun hours per day. Four hours is even better if budget and space allow.
Example (9,000Wh battery):
- 9,000Wh ÷ 6 hours = 1,500W array
- 9,000Wh ÷ 4 hours = 2,250W array (faster recharge, better for cloudy days)
If your recharge time stretches to 8–10 hours, add more panels. You won't be putting enough power into the batteries during the day.
Step 6 — Calculate Number of Panels Needed
Formula: Array Size in Watts ÷ Panel Wattage = Number of Panels
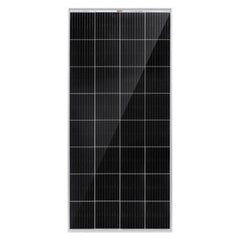
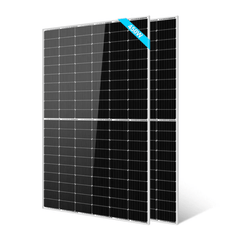
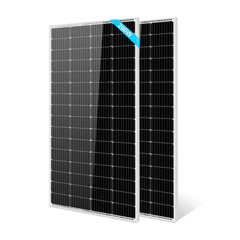
The most popular solar panel sizes are 200W (versatile, lighter, easier to handle) and 400-475W (large-scale residential, ~50lbs each, usually sold in minimum quantities of 8).
Example:
- 1,500W ÷ 200W = 7.5 → round up to 8 panels (1,600W)
- 2,250W ÷ 410W = 5.5 → 6 panels (2,460)
Step 7 — Size Your Inverter
Your inverter converts stored DC battery power into usable AC power for your appliances. Most inverters also work as chargers — you can drive power into your batteries from a generator or wall outlet through the inverter.
Size your inverter based on your single biggest load — not your average load.
Every appliance surges when it first starts up. A well pump rated at 1,000W run may surge to 4,000W at startup. Most inverters handle 3× their continuous rating for about 30 seconds — always check specs before buying.
Most popular inverter sizes:
| Size | Best for |
|---|---|
| 1,000–2,000W | Small systems, basic loads |
| 3,500–4,000W | Mid-size systems, some larger appliances |
| 6,000W | Whole-home backup, well pumps, AC units |
| 12,000W+ | Large homes, heavy commercial loads |
Example: Average load of 450W, largest appliances are a 15,000 BTU AC (1,500W run) and a 1HP well pump (4,000W surge). A 6,000W inverter is the safe choice — handles both surges with room to grow.
Summary — Your Three Numbers
| Component | Example System |
|---|---|
| Battery Bank | 9,000Wh (9kWh) |
| Solar Array | ~1,500–2,000W |
| Inverter | 6,000W |
The most common mistake: sizing too small. Nobody has ever called us saying they have "too much power". If your battery dies two hours after sunset or your inverter keeps tripping a breaker — you went too small.
Bonus: How Long Will a Battery Run an Appliance?
This is probably the single most common question we get:
Formula: Battery Size in Wh ÷ Appliance Watt Draw = Run Time in Hours
Examples:
- 3,600Wh battery ÷ 100W fridge = 36 hours
- 3,600Wh battery ÷ (100W fridge + 50W TV + 50W lights = 200W) = 18 hours
With this one equation, you're already ahead of most people trying to figure out off-grid solar.

3. Real-World Examples: Cabin & RV
The math above is solid — but most people want to see it applied to a real situation before they trust it. Here are two complete worked examples covering the two most common use cases we see.
Real-World Example #1: Off-Grid Cabin (400 sq ft)
A 400 sq ft off-grid cabin running basic essentials: fridge, lights, a few fans, phone chargers, WiFi, and a small TV. No air conditioner, no well pump.
Step 1 — Load Calculation
| Appliance | Avg Wattage | Hours/Day | Daily Energy |
|---|---|---|---|
| Refrigerator | 100W avg | 24h (cycles on/off) | 600Wh |
| LED lights (6 bulbs) | 25W | 5h | 750Wh |
| Fans (2) | 60W | 6h | 720Wh |
| TV | 120W | 3h | 360Wh |
| Phone chargers (2) | 20W | 3h | 120Wh |
| WiFi router | 15W | 24h | 360Wh |
| TOTAL | 2,910Wh (~3kWh/day) |
Total Average Hourly Load (TAHL): ~120W
Step 2 — Battery Bank
120W × 20 hours = 2,400Wh (2.4kWh)
Round up to a 5kWh battery bank for comfort and cloudy day buffer.
Step 3 — Solar Array
5,000Wh ÷ 6 hours = ~800W of solar panels
(4 × 200W panels, or 2 × 400W panels)
Step 4 — Inverter
Biggest single load: fridge compressor startup (~600W surge). A 2,000W inverter handles this easily with room to spare.
What This Costs at ShopSolar
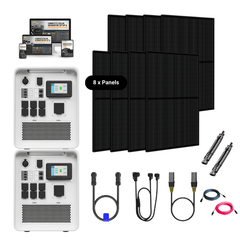
A CORE Power Kit covers this use case perfectly — starting around $2,500–$4,500 depending on battery size and panel count. Includes panels, inverter/charger, lithium battery, charge controller, cabling, and wiring diagram.
Want to add a well pump or mini-split AC later? Size up to a PRIME Power Kit ($5,000–$9,000) and you'll have room to grow.
Real-World Example #2: RV Solar Setup
A typical RV or van build running a 12V fridge, phone chargers, lights, a laptop, and a fan. No air conditioner — running AC on solar in an RV requires a serious system, and most people use shore power or a generator for that.
Step 1 — Load Calculation
| Appliance | Avg Wattage | Hours/Day | Daily Energy |
|---|---|---|---|
| 12V RV fridge | 45W avg | 24h | 1,080Wh |
| LED lights (4) | 20W | 4h | 320Wh |
| Fan (roof vent) | 25W | 8h | 200Wh |
| Laptop | 60W | 4h | 240Wh |
| Phone chargers (2) | 20W | 2h | 80Wh |
| TOTAL | 1,920Wh (~2kWh/day) |
Total Average Hourly Load (TAHL): ~80W
Step 2 — Battery Bank
80W × 20 hours = 1,600Wh
Target: a 2,000Wh (2kWh) lithium battery. Most popular choice: a 200Ah 12V LiFePO4 battery = 2,400Wh usable.
Step 3 — Solar Array
2,000Wh ÷ 6 hours = ~400W of solar panels
(2 × 200W roof-mounted rigid panels is the sweet spot for most RVs)
Step 4 — Inverter
Biggest load: laptop charger and a few lights simultaneously. A 1,000–2,000W inverter is plenty.
What This Costs at ShopSolar
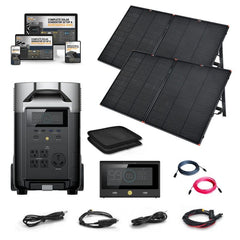
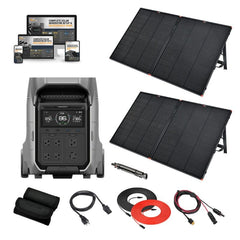
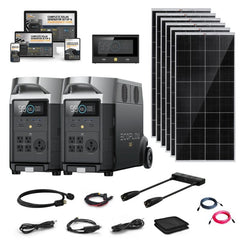
Solar generator route (easiest): An EcoFlow Delta 2 or Bluetti AC200P bundled with 2 × 200W panels runs $1,200–$2,500. Plug-and-play, no wiring required.
Custom RV build route: 200Ah lithium battery + 400W panels + MPPT controller + 1,500W inverter runs $1,500–$3,000 depending on brands. More work to install but more expandable.
Browse Solar Generator Kits →
4. Budget Ranges: What Does Off-Grid Solar Actually Cost?
One of the most common questions we get — and one of the hardest to answer without knowing your specific needs. Here are realistic ballparks based on what our customers actually spend.
RV / Van / Camper
| Setup | What You Get | Approximate Cost |
|---|---|---|
| Starter (weekend trips) | 200–400W panels + 1–2kWh battery + solar generator | $800–$1,500 |
| Mid-range (full-time van life) | 400–800W panels + 2–4kWh lithium + custom build | $1,500–$3,500 |
| Full-featured (larger RV) | 800W+ panels + 5–10kWh battery + 2,000W inverter | $3,500–$6,000 |
Off-Grid Cabin / Home Backup
| Setup | What You Get | Approximate Cost |
|---|---|---|
| Small cabin (lights, fridge, basics) | 800W–1.6kW panels + 5–10kWh battery | $2,500–$5,000 |
| Medium cabin (full off-grid living) | 1.6–4kW panels + 10–20kWh battery | $5,000–$12,000 |
| Whole-home backup / full off-grid home | 4kW+ panels + 20–40kWh battery | $12,000–$30,000+ |
Important note: These are equipment costs only. If you're doing a DIY+ install — doing the work yourself and hiring a local electrician for final connections — you'll save thousands compared to a full-service install. That's the ShopSolar model: we supply the equipment and the expertise, you save on installation.
Use our Solar Kit Finder for a personalized recommendation →
5. Choosing the Right Solar Kit
Solar Generator Kits vs. Custom Solar Systems
Custom Solar Kits
Custom kits offer more power and expandability. They can grow with your needs and are the right choice for full-time off-grid living, whole-home backup, or offsetting your electricity bill with grid independence. The tradeoff: they're more complex to install and almost always require a licensed electrician for final connections and safety sign-off.
Solar Generator Kits (All-in-One)
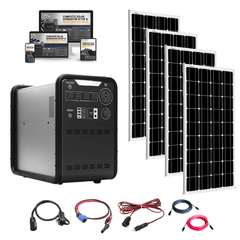
Solar generators have come a long way since 2018 when we first started ShopSolarKits.com. The key question: how portable and mobile do you need to be?
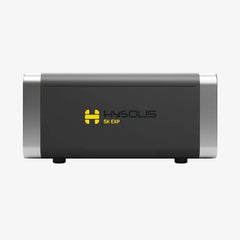
SoGen kits pack the battery, charge controller, and inverter into a single rugged unit with clearly labeled ports. Zero wire cutting or stripping. Plug the panels in one end, plug your appliances into the other — you're running.
They're ideal for emergency backup, weekend getaways, RVs, food trucks, and mobile commercial applications. They're not as expandable as custom systems, and for the same storage capacity can cost more — but if time and simplicity matter more than cost, they're your best bet.
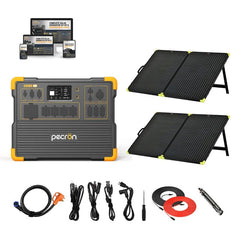
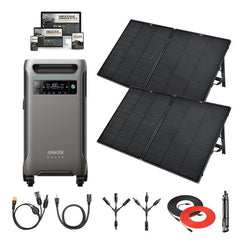
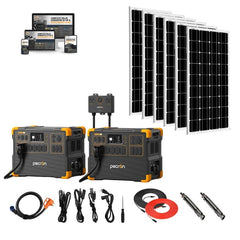
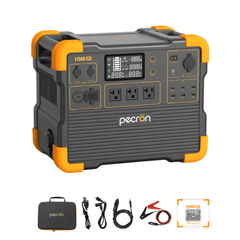
Popular brands at ShopSolar: EcoFlow, Jackery, Bluetti, Anker, Pecron.
Rigid vs. Folding Solar Panels
The performance difference between rigid and folding panels is minimal — this comes down to use case.
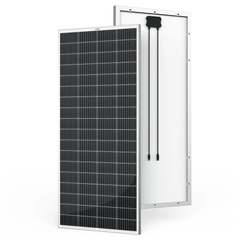
Rigid panels are cheaper, typically last longer, and are designed to be permanently mounted outdoors. They can also be used portably by leaning them against a wall, fence, or bricks.
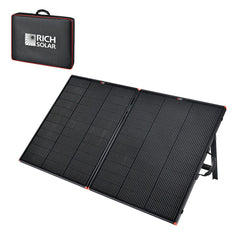
Folding panels cost more because of the convenience of portability — folding up and sliding into the back of a car. Great for camping, RVs, and emergency kits you want stored away.
Roof Mount vs. Ground Mount
Ground mount is the most popular option at ShopSolar. You can usually find a better location, angle the array perfectly toward the sun all day, and cleaning and maintenance are far easier since you can walk right up to the panels.
Roof mount looks cleaner and more traditional. Maintenance is trickier when you're navigating your roofline.
Realistically, most people don't choose — they use what their property allows. If your roof works perfectly, use it. If it doesn't, ground mount.
6. LiFePO4 vs. Lithium-Ion: What's the Difference?
When people say "lithium battery" for solar, they usually mean one of two chemistries. Understanding the difference matters when you're choosing between a solar generator kit and a custom build.
Lithium-Ion (NMC — Nickel Manganese Cobalt)
Used in: many early EcoFlow models, some laptop-style power stations
- Higher energy density (more storage in a smaller, lighter package)
- Slightly lower cost per watt-hour
- Rated for ~500–1,000 charge cycles
- Less tolerant of heat, overcharging, and deep discharge
- More sensitive to cold temperatures
LiFePO4 (Lithium Iron Phosphate)
Used in: most modern EcoFlow DELTA Pro models, Bluetti, Jackery, all custom solar build batteries
- Longer lifespan — rated for 3,000–6,000+ charge cycles (10+ years of daily use)
- More stable chemistry — significantly safer, less fire risk
- Better cold weather performance (still loses some capacity below freezing, but more resilient than NMC)
- Slightly heavier and larger for the same storage capacity
- The clear winner for off-grid cabin and RV applications where longevity matters
The bottom line: For any serious off-grid application — cabin, RV, home backup — LiFePO4 is the right chemistry. The higher upfront cost pays for itself many times over in lifespan. A LiFePO4 battery rated for 3,500 cycles used once daily lasts nearly 10 years. A lithium-ion battery rated for 800 cycles lasts just over 2 years at the same usage rate.
All of ShopSolar's custom build batteries and the majority of our solar generator lineup use LiFePO4 chemistry.
7. Setting Up & Installing Your Type of Solar System
Off-Grid Home Solar Systems
Home solar is the most common application — great for backup during blackouts, reducing your electricity bill, or full grid independence.
The biggest advantage of home systems over mobile setups is space. You have room for panels, inverters, and batteries — a garage corner, a backyard ground mount, whatever works.
[DIAGRAM: Typical off-grid home solar system wiring layout — panels → charge controller → battery bank → inverter → AC loads]
Installation Tips
Panel mounting:
Roof works great if you have good sun exposure and minimal shading. Ground mounting is ideal when roof space is limited or shaded, and makes cleaning much easier.
Other components:
- Since the inverter, charge controller, and batteries don't need sunlight, you can place them anywhere — mounting to a wall is common practice.
- If wall mounting isn't feasible, mount everything to a plywood sheet — cleaner install, no tangled or damaged wiring.
- Keep all components close to each other. Longer DC cables mean more power loss.
Optimization:
- Use a solar thermal unit for water or space heating rather than running electric heaters off your solar system — much more efficient.
- Keep a diesel or gas generator for occasional large loads or rare multi-day outages. It doesn't make financial sense to build a battery bank sized for an event that happens once every few years.
Portable & Mobile Solar Systems (RV, Van, Boat)
Van life, RV travel, liveaboard boats — portable solar power solves the core challenge of access to energy in a vehicle. A van's battery runs on gasoline or diesel — expensive and limited. Solar gives you clean, free power wherever you park.
[DIAGRAM: Typical RV/mobile solar system — roof panels → MPPT controller → lithium battery bank → fuse block → DC loads + inverter for AC loads]
Installation Tips
Maximize panels:
Install as many panels as your roof can physically fit. Space is your limiting factor on an RV or boat, not math. Overdesign — sunlight is less predictable based on where you're parked or facing, and panels generate less on a vehicle than on a fixed home mount.
Panel installation:
- Mount using Z-style brackets or adjustable tilt mechanisms drilled into the roof. Seal all holes with weatherproof sealant once installed to prevent water intrusion.
- Flexible panels are an alternative — no drilling required, more aerodynamic, slightly more expensive.
Wiring:
- Use weatherproof roof cable entry glands to route wires inside.
- 10 AWG cables are the most common for RV applications.
- Pro tip: use higher voltage, lower current configurations where possible — cables don't need to be as thick and you'll reduce losses and save money.
Battery selection:
Lithium batteries are far better than lead-acid for mobile use. Lighter weight, higher depth of discharge (more usable storage per bank size), and much longer lifespan. Worth the extra cost.
Wiring your loads:
- Use a fuse block for DC appliances — it has multiple fuses of different ampere ratings, making it easy to connect loads of different sizes cleanly.
- For AC loads, install a small distribution panel with standard wall outlets near your desk or sleeping area.
Optimization:
- A roof vent fan that pushes hot air out (with a floor vent pulling cool air in) makes a massive difference compared to running AC.
- Painting your vehicle white noticeably reduces heat absorption.
- Electric seat heaters and heated blankets are far more efficient than space heaters.
Emergency Backup Power Systems
Power outages are not new to Americans — from Oklahoma's ice storm in 2020 to the Texas winter storm in 2021, the cost and frequency of grid failures is rising. Brownouts, scheduled rotating outages, and natural disasters make a backup plan essential.
Traditional generators have real problems: you depend on a fuel supply that may not be accessible during the emergency itself, they're noisy, they pollute, and you can't safely run them indoors.
Solar backup systems solve all of these. They use the same core components as regular off-grid systems — the key difference is that they're sized and configured to power your essential loads during a grid event, not necessarily to run 24/7.
Many people keep the equipment stored in a basement or garage and set it up portably when a blackout hits. Foldable panels are popular for this reason.
[DIAGRAM: Emergency backup system — foldable panels → solar generator → transfer switch → essential home circuits (fridge, lights, fan)]
Key Addition: The Transfer Switch
A transfer switch is what makes emergency backup practical. It connects your solar system to specific circuits in your breaker panel — you choose which ones (refrigerator, living room lights, a fan, phone chargers, etc.).
When the grid goes down, you flip the switch and those selected circuits run from solar instead. When the grid comes back, you flip it back.
Two options:
- With a transfer switch: cleaner, easier, uses your existing home circuits. Works best with a solar generator as the power source — a single portable connection point.
- Without a transfer switch: you run individual extension cords from your solar generator to each appliance you want to power. It works, just less convenient.
Installation note: transfer switches are more complex than basic solar installs — most manufacturers recommend a licensed electrician for this part. Browse transfer switches →
Solar Generators — The Simplest Off-Grid Option
If the idea of wiring a full system sounds like too much, a solar generator is your answer.
Someone had the brilliant idea of putting the battery, charge controller, and inverter into a single rugged box with clearly labeled input/output ports. No wire cutting, stripping, or bolting. Just connect your panels to the input and plug your appliances into the output.
Modern solar generators also include features like Bluetooth connectivity, wireless charging pads, and mobile app monitoring.
Key advantages:
- Truly portable — handles, wheels, can be moved anywhere
- Lithium-ion or LiFePO4 batteries — maintenance-free, long-lasting
- Perfect partner for a transfer switch in emergency backup setups
- Zero installation expertise required
Limitations:
- More expensive per watt-hour than a custom build
- Fixed size — not as expandable for large home systems
- Designed for portability, not maximum capacity
If time and simplicity matter more than cost, this is your best starting point. You can always add more panels or a second unit later. Shop solar generators →
8. Cold Weather & Winter Performance: What You Need to Know
If you're building an off-grid cabin in Montana, Canada, the Pacific Northwest, or anywhere that sees real winters — this section is critical.
Solar Panels in Cold Weather: Good News
Solar panels actually perform better in cold temperatures than in heat. Photovoltaic cells are more efficient at lower temperatures — a panel rated at 400W in standard test conditions may actually produce slightly more on a crisp winter day than on a hot summer afternoon.
Snow is the main concern, not cold. A few inches of snow covering your panels brings production to zero. The good news: panels are typically mounted at an angle, which helps snow slide off naturally. A ground-mounted array is easy to clear manually if needed. South-facing roof mounts often self-clear within a day or two of sun.
What to account for: Winter days are shorter. In northern states and Canada, you may only get 3–4 peak sun hours per day in December vs. 6+ in summer. Size your system for winter worst-case if you plan to live off-grid year-round.
Lithium Batteries in Cold Weather: The Critical Detail
Here's where most people get caught off guard: LiFePO4 batteries cannot be charged below 32°F (0°C) without damaging the cells. They can discharge (power your appliances) in cold weather — down to about -4°F (-20°C) — but charging in freezing temps causes lithium plating inside the cells, permanently reducing capacity.
What this means for your cabin:
- If your battery bank is in an unheated space (shed, exterior wall, uninsulated garage), you need a plan for winter charging.
- Most modern LiFePO4 batteries have built-in low-temperature cutoff protection — they'll stop accepting charge below freezing automatically to protect themselves, but this means your panels won't be filling your batteries on cold mornings until temperatures rise.
- Solution: Keep batteries in a heated or semi-heated space. Even an insulated battery box inside the cabin that stays above freezing is sufficient. Many cabin builders put the battery bank in a small insulated closet inside the living space.
What this means for your RV:
- Most RV solar generator units have built-in battery management systems (BMS) that handle cold weather protection automatically.
- For custom RV builds, keep the battery bank inside the vehicle, not in an exterior compartment exposed to freezing temps.
- Some premium batteries include a self-heating function that warms the cells before charging begins — worth the premium if you're camping in winter conditions regularly.
Winter Sizing Tip
If you're in a northern climate, you typically want to size your system more for winter, not just summer. A system sized for 6 peak sun hours/day will be seriously undersized when December brings 3 hours. Run your numbers with your local winter peak sun hours — Google "peak sun hours [your city] December" to get an accurate figure.
9. Shading: The Silent Killer of Solar Production
This doesn't get talked about enough and it catches a lot of first-time buyers off guard.
Why One Shaded Panel Ruins Everything
In a standard series-wired string of solar panels, the panels are electrically connected end-to-end like links in a chain. The weakest link limits the whole chain. If one panel is producing at 50% because a tree branch is casting a shadow on it, the entire string drops to 50% production — even the panels in full sun.
This is called the "Christmas lights effect" — one bad bulb takes the whole string down.
How to Avoid Shading Problems
Site selection: Before you commit to a location, spend a day watching where shadows fall across your proposed panel location — morning, midday, and afternoon. What looks like a sunny spot at 10am might be shaded by a roofline or treeline by 3pm.
Ground mounts: The easiest way to avoid shading issues. You can position your array in the best possible location on your property, away from trees and buildings, and adjust the tilt angle for your latitude.
Microinverters or power optimizers: If you can't avoid partial shading (common with roof mounts), microinverters (like Enphase) or DC power optimizers allow each panel to operate independently. A shaded panel no longer drags down the others. We carry microinverter systems at ShopSolar — worth the investment if shading is unavoidable.
MPPT charge controllers: All of our custom kits use MPPT (Maximum Power Point Tracking) charge controllers, which are significantly better than older PWM controllers at extracting power from panels under suboptimal conditions, including light shading.
Estimating Your Actual Production
Don't just trust the panel wattage ratings — those are tested under ideal laboratory conditions. Real-world production depends on your location, tilt angle, shading, and season.
PVWatts Calculator (pvwatts.nrel.gov) is a free tool from the National Renewable Energy Laboratory. Enter your location, system size, and panel tilt — it gives you month-by-month estimated production based on decades of real weather data. It takes 10 minutes and gives you a much more accurate picture than any rule of thumb.
10. Maintenance & System Care
One of the biggest advantages of solar power systems is how little maintenance they require. No moving parts means virtually no wear and tear. Here's all you need to do:
Cleaning Solar Panels
Clean panels produce more power. Aim to rinse them every few weeks — more often in dusty areas or on RVs where the angle is flatter and debris accumulates faster.
- A simple garden hose rinse followed by a wipe-down is all you need
- Avoid high-pressure water directly on junction boxes or cable connections
- Ground-mounted panels are much easier to clean than roof-mounted
Battery Maintenance
Modern lithium batteries require very little ongoing maintenance compared to older lead-acid batteries. Best practices:
- Check battery voltage regularly — your charge controller displays it. A fully charged 48V bank should read 48–52V.
- For emergency solar generators in storage: cycle them every 6 months. Run a TV or fridge off it for 6–8 hours, recharge from a wall outlet, then put it back in storage. This maintains battery health and verifies the system is working.
- For mobile systems: keep the battery bank neatly secured. Battery terminals are exposed and a dropped wrench can cause a short circuit. If batteries are tall with a small footprint, use a rope or strap to secure them.
Annual Full-System Check
Once or twice a year, do a complete connection check:
- Shut down the system
- Disconnect all wiring
- Clean connections with a brush
- Reconnect
- Check for leaking chemicals, rodent damage to wiring, or corrosion
That's it. Takes an hour. Extends system life significantly.
11. Applications & Insights
Off-grid solar works for far more than just homes and RVs. Here are some applications people often don't think of:
Electric Vehicle Charging
The common argument against EVs — that they indirectly use fossil fuels — disappears when you charge from solar. Truly zero-emission driving.
Your home has more than enough space for the solar panels needed to fully recharge an EV daily. Some people build solar sheds with an integrated charger — shelter for the car and free power in one.
Formula: Power required in kW = Energy required per day in kWh ÷ peak sunshine hours
Example: An average EV holds ~40kWh. In a location with 5 peak sun hours per day: 40kWh ÷ 5 hours = 8kW solar array needed
For a system powering only your EV, a smart DC EV charger can eliminate the need for an inverter entirely, and can prioritize solar charging over grid power automatically.
Well Pumps & Sump Pumps
Water is the second most critical need in an off-grid setting. For those not connected to municipal water, a solar-powered pump is essential.
Two approaches:
- Connect your AC pump to your solar system like any other appliance. The catch: AC pumps have a large startup surge and only run for short periods. You'll need to oversize your panels or avoid running other large loads simultaneously when the pump is active.
- Install a dedicated DC solar pump system. A DC motor-driven pump is more efficient, quieter, requires no inverter, and can operate on shorter cable runs. Cost for a custom system is often around $2,000. Modular, easy to maintain, and expandable.
Solar pumps work equally well for sump pumps — the principles are identical.
Small Mobile Businesses
Farmer's market stalls, food trucks, ice cream shops, physician clinics, pop-up retail — any small business with predictable power needs can run entirely on solar. The sizing process is identical: calculate your daily energy consumption, check sunshine hours for your location, size your battery and panel array accordingly.
Crypto Mining
Crypto mining has enormous energy requirements — mining one Bitcoin takes over 1,500kWh, with an average consumption of ~50kWh/day. Utility companies often charge heavy premiums when you exceed usage tiers, making grid power expensive for miners.
Solar offsets this dramatically. A 12kW+ array with appropriate battery storage can handle significant mining loads. The environmental benefit is an added bonus — solar addresses one of the most criticized aspects of crypto mining.
Air Conditioners
Most North American homes have central AC — a major power draw on any solar system. If you don't use AC year-round, consider leaving it on grid power and sizing your solar for everything else. If you're fully off-grid, you must include it.
Tips for reducing AC load on solar:
- Mini-split units are far more efficient than central systems — they cool one room at 500–800W vs. a whole-house system at 3,000W+
- Fans use just 50–100W vs. hundreds to thousands of watts for AC — passive cooling goes a long way
- Passive cooling strategies (shade, white paint, thermal mass) reduce how hard your AC has to work
Pool or Pond Heating
A warm backyard pool is one of life's pleasures — but electric resistance heaters are enormous power draws and a poor match for solar systems.
Better option: solar thermal pool heaters. Rather than converting sunlight to electricity and then back to heat (losing energy in both conversions), solar thermal systems use the sun's heat directly. An array of solar water heaters on a roof or ground beside the pool circulates water through panels to heat it. You can combine solar thermal with a conventional heater for backup on cloudy days.
Smaller portable solar thermal water heaters are also available — far cheaper and more portable than roof installations, suitable for smaller pools or warmer climates.
12. How to Buy: The Right Decision Sequence
This is one of the most practical questions we get from first-time buyers, and it almost never gets answered clearly. Here's the order that makes sense — and the compatibility rules you need to know before you spend a dollar.
The Golden Rule: Start with the Size of Your Inverter
Your inverter determines your system voltage. Everything else must be compatible with that voltage. Buy the inverter first and let it anchor the rest of your decisions.
Common system voltages:
- 12V — small RV/van systems, simple loads, lower power ceiling
- 24V — medium systems, better efficiency than 12V, good for larger RVs and small cabins
- 48V — the standard for serious off-grid homes and cabins, most efficient, handles the most power
Once you know your inverter voltage, your battery bank must match it exactly. A 48V inverter needs a 48V battery bank. This is non-negotiable.
The Decision Order
- Inverter/Charger — decides system voltage and sets your power ceiling
- Battery Bank — must match inverter voltage. Size based on your load calculation from this guide.
- MPPT Charge Controller — must be compatible with both your battery voltage and your panel array voltage. Check max input voltage specs carefully. Usually built into the inverters nowadays.
- Solar Panels — size based on your battery bank and recharge time target. Wire in series or parallel based on your charge controller's input specs.
- Cables, Fuses, Busbars, Connectors — size based on the current running through each part of the system.
- Mounting hardware — roof rack, ground mount, or Z-brackets depending on your installation.
Why Buying a Kit Sidesteps All of This
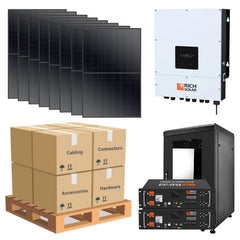
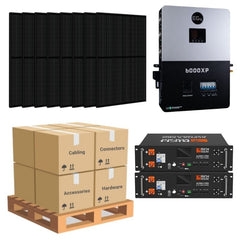
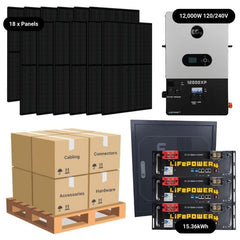
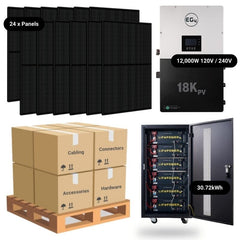
The reason ShopSolar's pre-built kits (CORE, PRIME, SELECT, ELITE) are so popular is that we've already done the compatibility matching for you. Every component in the kit is sized and specified to work together — the inverter voltage matches the battery, the charge controller specs match the panel array, the cables are the right gauge. You don't have to figure any of this out yourself.
If you want to build custom, the sequence above keeps you out of trouble. If you want to skip the compatibility puzzle, start with our Solar Kit Finder →
Appendix A: Load Calculation Worksheet
What Are Your Goals?
A common mistake is treating solar like a standardized product, like buying a TV. There is no one-size-fits-all. The right system depends on several factors. Work through the questions below to get clarity before you size anything.
| # | Question | Answer A | Answer B |
|---|---|---|---|
| 1 | How many appliances do you want to power? | A few → smaller system | Many → larger system |
| 2 | Do you plan to run heavy appliances (AC, heater, oven, pool heater)? | Yes → larger system | No → smaller system |
| 3 | How much space do you have for panels? | Limited → smaller system | Ample → larger system |
| 4 | What are your peak sunshine hours? | Low → larger system | High → smaller system |
| 5 | Do you have a backup generator? | Yes → fewer batteries needed | No → more batteries needed |
| 6 | Will you use this system daily or periodically? | Daily → larger system | Periodic → smaller system |
| 7 | Do you want the system grid-tied? | Yes → fewer batteries needed | No → more batteries needed |
Insight on question 4: To find your location's peak sunshine hours, Google "peak sunshine hours in [your city]."
Insight on question 5: A generator doesn't need to replace solar — it can supplement it for rare events like multi-day outages or unusually high loads. If you have one, you can size your battery bank more conservatively.
Common Appliance Wattage Reference
| Appliance | Average Wattage |
|---|---|
| Room light (LED) | 20–50W |
| Coffee maker | 600–1,200W |
| Microwave oven | 1,000–1,500W |
| Toaster | 1,200W |
| Refrigerator | 500–750W (label); ~100W average actual draw |
| Washing machine | 500–1,000W |
| Household fan | 50–120W |
| Mobile phone charger | 10–25W |
| Desktop computer + monitor | 200–400W |
| TV 50" | 100–150W |
| Well pump (⅓ HP) | 750W |
| Air conditioner | 1,000–1,500W |
| Dishwasher | 1,200–1,500W |
| Laptop | 100–150W |
Important note on fridges: Fridges cycle on and off — they don't run continuously at rated wattage. The label may say 500–750W but actual average draw is often 80–120W. If your load calculation seems high, reduce your fridge estimate significantly.
Two ways to find appliance wattage if not listed:
- Look for the sticker on the back or bottom of the appliance — find the value followed by W or kW
- Google "[appliance name and model] average wattage" or "power consumption"
Load Calculation Example
| Appliance | Wattage (W) | Quantity | Hours/Day | Daily Energy (Wh) |
|---|---|---|---|---|
| LED lights | 25W | 6 | 5h | 750Wh |
| Laptop | 150W | 1 | 8h | 1,200Wh |
| Fans | 60W | 3 | 4h | 720Wh |
| TV | 200W | 1 | 4h | 800Wh |
| Coffee machine | 800W | 1 | 0.25h | 200Wh |
| Refrigerator | 800W | 1 | 6h | 4,800Wh |
| TOTAL | 8,470Wh (8.47kWh) |
To convert to kWh: divide total Wh by 1,000.
Your turn: List every appliance you want to power, multiply wattage × quantity × hours per day, add them up. This is the foundation of your entire system sizing.
Appendix B: Wiring a Battery Bank
Battery Bank Connections
Wiring a solar system is simpler than it looks. Think of it like following a map — you don't need to understand the whole thing at once. Just focus on connecting one item to the next, one step at a time.
Two universal rules:
- Polarity: Always connect positive to positive (+) and negative to negative (−), unless intentionally wiring in series. Use colored cables — red for positive, black for negative.
- Cable size: Use the correct gauge wire for the current flowing through it. Undersized cables are a fire hazard.
To find current when you know power and voltage:
A (current) = W (power) ÷ V (voltage)
Example: 1,000W at 24V = 1,000 ÷ 24 = 41.7A
Pro tip: Use higher voltage, lower current configurations where possible. Higher voltage doesn't require thicker cables, and you'll reduce losses and save money on wiring.
[DIAGRAM: Basic off-grid solar system wiring — solar panels → MPPT charge controller → battery bank → inverter → AC loads. Include DC load controller branch. Label all connections clearly.]
Wiring the Batteries
Your battery bank voltage must match your inverter's DC input voltage. If your inverter needs 48V DC input, your battery bank must output 48V.
You have three main options:
Option 1 — Solar Generator (Simplest)
Everything is pre-wired in a single unit. Connect panels to the input port, appliances to the output. No battery wiring required. Best for most beginners and portable applications.
Option 2 — Single Battery at Required Voltage
Modern battery banks are available at 24V, 48V, or other common voltages — you don't have to wire multiple 12V units together. Just connect the charge controller to one end and the inverter to the other.
Option 3 — Multiple 12V Batteries Wired Together
If you have multiple 12V batteries and need higher voltage, you'll need to understand series and parallel wiring.
Series connection — adds voltage, keeps capacity the same:
Connect the positive terminal of one battery to the negative of the next. Four 12V batteries in series = 48V at the same kWh capacity.
[DIAGRAM: Series battery wiring — 4 x 12V batteries connected positive-to-negative, outputting 48V total]
Parallel connection — adds capacity (kWh), keeps voltage the same:
Connect all positive terminals together and all negative terminals together. Two 12V/100Ah batteries in parallel = 12V at 200Ah.
[DIAGRAM: Parallel battery wiring — 2 x 12V batteries with positive terminals connected together and negative terminals connected together, outputting 12V with doubled capacity]
Combination (series + parallel):
Most real-world systems need both higher voltage AND higher capacity. Example: 8 batteries, each 12V/1kWh, target 8kWh at 48V.
- Series alone: 8 batteries × 12V = 96V (too high) at 8kWh
- Parallel alone: 8 batteries at 12V, 8kWh (voltage too low)
- Solution: Wire 4 batteries in series → one "string" at 48V/4kWh. Make two strings. Wire the two strings in parallel → 48V at 8kWh.
[DIAGRAM: Series-parallel combination — 2 strings of 4 x 12V batteries, each string in series for 48V, both strings in parallel for doubled capacity]
When physically connecting batteries, strip cable ends, attach crimp connectors, and bolt to the terminal. Always place batteries in a dry location — conductive fluids on terminals cause serious short circuits, equipment damage, and fire.
Appendix C: Grid-Tie vs. Off-Grid Solar
The "Modern Off-Grid" System: Why You Don't Need Utility Approval
There are three ways people think about solar. Two of them are well-known. The third — the one we think is the smartest — almost nobody talks about clearly.
Grid-tied (the old model)
This is what most people picture when they think "home solar." Panels on the roof, excess power sold back to the utility company. Sounds great in theory. In practice, the utility pays you pennies per kilowatt-hour for power you generate, and your system shuts off completely when the grid goes down. No independence whatsoever — just a smaller electricity bill and a system that goes dark during every blackout.
Fully off-grid
No utility connection at all. Your solar and battery system is your only power source. This is what most of our customers are building — cabins, remote properties, full-time off-grid living. Total independence, but requires careful sizing and planning.
Modern off-grid (behind the grid)
This is the one worth understanding. You install a solar and battery system in your home, but instead of selling excess power back to the grid, you keep it all in your own battery bank. Your system stays completely behind the utility connection — it can pull power from the grid when needed (say, on a cloudy week or overnight during peak charging hours), but it never pushes power back out.
The utility company has zero problem with this. In fact, they prefer it — because when your system draws from the grid, you're paying for it. You're just a regular electricity customer who happens to have a very large battery.
This is the key distinction most people miss:
Pulling power from the grid to charge your batteries is no different than plugging your phone into the wall. It's just a much bigger battery connected to your electrical panel. The utility company doesn't know, doesn't care, and doesn't need to approve anything.
Grid-tied means you want to sell power back. That requires utility approval, special equipment, and a lot of paperwork — and they'll pay you so little it's rarely worth it.
Modern off-grid means you want to use solar to power your home and reduce what you draw from the grid, with the grid as a silent backup for when you need it. Think of it like a gas generator that's always on standby — except it's quiet, clean, and you never have to buy fuel.
The practical result: your electricity bill drops significantly, you have backup power during outages, and you never had to make a single phone call to your utility company to make it happen.
What's the Difference?
When you drive down a residential street and see panels on rooftops, 99% of those are grid-tied systems. The homeowner is generating power and selling any excess back to their utility company. These systems connect directly to the grid — meaning if the grid goes down, their power goes down too. No independence.
[DIAGRAM: Side-by-side comparison — grid-tie system (panels → inverter → grid) vs. off-grid system (panels → charge controller → battery → inverter → loads)]
Off-grid solar means all the power you generate goes into your own battery bank. You're not selling back to the grid — you own every watt you produce. When the grid goes down, you keep the lights on.
A hybrid system gives you both: connected to the grid for convenience, but with battery backup so you're protected when the grid fails. Most of the systems we sell at ShopSolar fall into this category — you can pull from the grid on cloudy days or during high demand, but you have true energy independence when it matters.
Why Do You Need a Battery?
The most common question from first-time buyers: "Why do I even need a battery?"
Simple answer: how are you going to power your appliances every night when the sun goes down?
After 5–6pm, your panels stop producing meaningful power. From that point until 8–9am the next morning, everything runs from stored battery power. Without a battery, you have power during the day only. With a battery, you have power around the clock.
What Does an Off-Grid Solar System Look Like?
Three main parts:
- Solar panels (array) — capture sunlight and convert it to DC electricity
- Battery bank (storage) — stores power for use when the sun isn't shining
- Inverter — converts DC battery power to AC power your appliances can use
Supporting components include a charge controller (regulates charging to protect the battery), cables, fuses, bus bars, and MC4 connectors — but these don't affect sizing decisions.
[DIAGRAM: Basic off-grid system overview — panels → charge controller → battery bank → inverter → home loads. Simple, clear, labeled.]
Appendix D: Solar Generator Wiring Diagram
This diagram shows how to connect solar panels to a solar generator/power station.
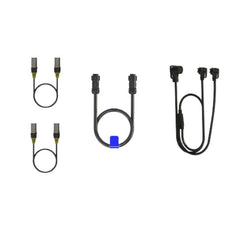
[DIAGRAM: 2 solar panels connected in series to a solar generator. Label: MC4 female connectors, MC4 male connectors, positive wire (red), negative wire (black), panel output to generator PV input port.]
Compatible panels for this configuration:
- 100W 12V Rigid panels
- 100W Briefcase (folding) panels
- 200W 12V Rigid panels
- 200W Briefcase (folding) panels
Important notes:
- Both panel output wires often come in black from the factory — connect based on polarity markings, not wire color
- Extend PV output using PV cable extensions — use one extension per two briefcase-style panels
- Always connect female MC4 connectors to male connectors and vice versa
- Ensure all connectors are fully seated and locked — loose connections cause poor production or can heat up and cause fire
- Panels not listed above should be verified for compatibility with your specific generator's input specifications (check the manual)
Appendix E: Custom Solar Kit Schematic Diagram
[DIAGRAM: Full custom off-grid system schematic — solar panel array → combiner box → MPPT charge controller → battery bank (showing series/parallel connections) → inverter/charger → AC distribution panel → loads. Include DC branch with fuse block. Label all components, wire gauges, and connection points clearly.]
Appendix F: Parts Lists by System Type
Home or Small Business System
- Monocrystalline solar panels
- MPPT charge controller
- Pure sine wave inverter
- Lithium batteries (LiFePO4 recommended)
- Mounting racks (roof or ground)
- Cables and wire (appropriately sized)
- Fuses and circuit breakers
- MC4 connectors
- Busbar or combiner box
- Lugs and terminals
Portable or Mobile System (RV, Van, Boat)
- Monocrystalline solar panels (rigid or folding)
- MPPT charge controller
- Pure sine wave inverter
- Lithium batteries
- Mounting brackets (Z-style or adjustable tilt)
- Fuses and circuit breakers
- Weatherproof roof cable entry glands
- Fuse block for DC loads
Emergency Backup System
- Monocrystalline solar panels (folding panels ideal for storage)
- All-in-one solar generator
- Transfer switch
- Mounting racks (or portable stands)
- Cables and PV extensions
About ShopSolar
We're a team on a mission to make solar simple, affordable, and accessible to everyone.
Founded in 2018, we've helped 50,000+ customers across the U.S. and Canada achieve energy independence. We've built a reputation for honest advice, extremely competitive pricing, and lifetime customer support that doesn't disappear after the sale.
We believe the future of energy is smaller, more flexible, and more independent — and we're here to help you get there, whether you're powering a weekend cabin or going fully off-grid.
Have questions about sizing your system? Our team of solar and battery experts is available by phone, email, or live chat. No pressure, no pushy sales tactics — just real advice from people who've helped tens of thousands of customers do exactly what you're trying to do.
📞 877-242-2792 | Mon–Thu 10am–5:30pm EST, Fri 10am–1pm EST
🌐 shopsolarkits.com
📧 info@shopsolarkits.com