

Solar Panel Positive and Negative


Table of Contents
Short on Time? Here’s The Article Summary
The article explains how to determine the positive and negative terminals of a solar panel, crucial for proper installation to avoid energy wastage. Methods include examining the diode and using a voltmeter to measure voltage. It also discusses checking solar panel polarity and fixing reverse polarity issues.
Connecting a solar panel to a battery via a charge controller is detailed, emphasizing safety and proper wiring. The use of MC4 connectors for simplifying solar array wiring is highlighted. Overall, the article provides practical guidance for correctly installing and connecting solar panels to maximize energy efficiency.
Introduction
It’s important to know where the solar panel's positive and negative terminals are while installing one. If your solar system is not set up correctly, you could be wasting energy.
In this article, you will learn how to determine the positive and negative terminals of a solar panel. We will also show you how to check solar panel polarity, and how to connect a solar panel to a battery.
How to Determine the Positive and Negative Terminals of a Solar Panel
Look at the Diode
Do you have a solar panel without polarity labels? In that case, you must determine the correct polarity to make sure everything is wired correctly. This means you must figure out which terminal or wire is positive and which is negative.

Here are some suggestions that can be applied indoors.
The junction box has at least one bypass diode if you can get it open. This prevents power loss that happens when a solar panel is in the shade and not producing at its full efficiency. When the panel is shaded and has a higher resistance, it offers an alternate path for the current.
If you’re mixing solar panels of different wattage, you need to make sure the positive and negative diodes are lined up correctly to prevent burning out the system.
Measure with a Voltmeter
You can also use a volt meter to measure the voltage. This determines the solar panel's polarity. Even when inside a building, a simple voltage reading will reveal the polarity of a solar panel.
Put the red positive meter lead on one side and the black negative lead on the other. This measures across the terminals or wires of the solar panel.
You must set the volt meter to read DC Volts. If there’s a negative number displayed on the voltmeter then that means that the leads are pointing in the wrong direction. A minus sign indicates a negative charge.
The black meter lead should be on the negative and the red meter lead on the positive after flipping them over. This should reveal a positive number without a negative symbol.
Most residential solar panels can only produce 3 volts. This is because the solar panel sits inside the structure, upside down. It therefore only receives a little amount of light. It is, however, sufficient to obtain an accurate reading of polarity.
Voltage is less impacted by light intensity than current is. This means there probably wouldn't be any current with such a little light if you tried to measure it.
How to Check Solar Panel Polarity
The polarity of the solar panel is a crucial factor to consider during installation. If your system is not configured properly, you could end up wasting energy and have to buy more power from the grid, which hurts your wallet.

Polarity
Let's look at what the word polarity means. Polarity essentially means that the generator has positive charges on one side and negative charges on the other.
The voltage difference allows electric currents to flow from one end of the wire to the other.
You need a voltmeter or multimeter if you want to check the polarity of your solar panel.
Step 1: Turn off the power going into your DC circuit breaker box.
Step 2: Remove the covers that are protecting your PV panels’ wiring terminals.
Step 3: Put one probe from your voltmeter onto each of the two-terminal leads connected to an individual PV module. If both probes show a positive voltage, this side of the generator has positive charges. The negative charges are on the other side.
The voltage difference allows for electric current to flow through wires from one end to another. This produces electricity. You have now correctly identified positive and negative polarity.
What Is Reverse Polarity
Reverse polarity is when you get two different readings. For example one positive and one negative reading. The cause of reverse polarity is usually incorrect wiring or damaged equipment.
You can reverse your generator's solar power output if you have an older inverter that is not compatible with newer PV modules. If this is the case, then it will need to be repaired. The purpose of repairing is for electricity power generation to flow correctly through wires from one end to another. This will produce energy.
You can also reverse the polarity of the generator if your inverter is not compatible with your new solar panels.
How Do I Fix Reverse Polarity
If your inverters are not compatible with your new solar panels, you can reverse the polarity of your generator. To do this, open up your circuit breaker box to expose all wires coming into it.
You now need to identify which wire corresponds to a positive voltage. After doing this, you need to attach that lead from your voltmeter onto a negative terminal on your DC fuse block.
The leads may be identified backward (for example, the + is identified as a -). In this case, you can reverse these leads by switching them where they connect at the terminals. This will be inside the DC circuit breaker box. If red was originally connected to the negative (-), then change it so that black is attached instead.
After this is done, you can reconnect the covers over the wiring terminals. Remember to first check once more proper polarity.

Can Solar Panels Work in Reverse?
Solar panels can work in reverse but not very efficiently. Solar panels perform best when they all face the same direction and give off electricity from the same side.
If you have a large system, then it’s important to make sure that each panel is connected with positive polarity on one end and negative polarity on the other. This is so that power generation flows from one end of your solar array to another.
Your system will produce less electricity if they are wired in reverse.
How to Connect a Solar Panel to a Battery
The tools, materials, and steps needed to connect a solar panel to a battery are listed below.
Tools
- Heat gun
- Screwdriver
- Wire crimper
- Wire stripper
- Wire cutter
Materials
- Gloves
- 100 watt 12-volt solar panel
- fuse holder with 20 amp blade fuse
- 12-volt battery
- MC4 solar adapter cables
- 30A solar charge controller
- Heat shrink tubing
- 15 amp MC4 inline fuse
- 12 gauge wire
- 12 gauge wire connectors
- MC4 solar extension cables
You can find some awesome solar panel kits online at affordable prices. This will make the installation simpler. You will also need to know what size cable for the 12v solar panel.
Steps:
Step 1: Understand The Wiring System
Don’t connect a solar panel directly to a battery. Rather connect the battery and solar panel to a solar charge controller.

Step 2: Make the Cables for the Battery
You also need to know what kind of battery your solar panel needs. You can use pre-made battery cables. If you don’t have pre-made battery cables, then you can make your own.
Step 3: Connect the Battery to the Charge Controller
Your charge controller should have a manual with instructions for connecting it to the battery.
If you don’t have an instruction manual, follow the instructions below.
- Connect the negative battery cable (the one with no fuse) to the “-” battery terminal on the charge controller.
- Connect the positive battery cable (the one with the fuse) to the “+” battery terminal.
- Connect the battery cables to the battery terminals. First the negative, then the positive.
If your charge controller turns on, then this means that the battery is properly connected. You can also learn how to charge multiple batteries with one solar panel.
It’s also possible to use two charge controllers with one solar panel.
Step 4: Connect the Solar Panel to the Charge Controller
You will need an MC4 solar adapter cable to connect a solar panel to your charge controller. Try to find a solar panel cable that has one pre-attached.
Step 5: Put the Solar Panel in the Sun
Put your solar panel in direct sunlight at the best-tilted angle for your location.
If you live in an off-grid area, you may also find it important to know how to set up solar panels off-grid.
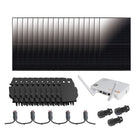
How to Use Solar Panel Connectors and Cables
Most modern high-power solar modules are made with wire leads that have MC4 connectors on the ends. They use these MC4 connectors because they make the process of wiring your solar array much simpler and faster.
So, what are an MC4 connector and an MC4 extension cable?
The connectors are available in both male and female types. These are made to snap together. MC4 connectors have a locking mechanism. Because of this, they will not come unplugged and are well suited for outdoor areas.

Key Takeaways
We now know that it’s important to figure out which wire on your solar panel is positive and which is negative. If your solar panel has no labels, this can be difficult.
By looking at the diode and measuring with a voltmeter, you can determine the polarity. It’s always helpful to also know what reverse polarity is and how to connect a solar panel to a battery.
By reading the information in the article, you are able to have a fully functioning solar panel in no time.
The Ultimate Solar + Storage Blueprint (Mini Course)
Struggling to understand how solar + storage systems actually work? Looking to build or buy your own solar power system one day but not sure what you need? Just looking to learn more about solar, batteries and electricity?
Join 15,000+ solar enthusiasts breaking free from their energy dependence with this short step-by-step video course that will make you a solar + storage expert. Start your journey to energy independence today.

Who is ShopSolar.com?
ShopSolar.com is the #1 digital platform that enables consumers & businesses to source and purchase complete solar + storage solutions direct, saving you thousands in time, energy and money! With over 40,000+ happy customers, we’re on a mission to make solar simple, transparent and affordable.
Did You Find Our Blog Helpful? Then Consider Checking:
- Sailboat Solar Panel Installation
- Installing Solar Panels on Van
- How to Charge Multiple Batteries with One Solar Panel?
- How to Charge Lithium-Ion Battery with Solar Panel?
- How to Calculate Solar Panel Battery and Inverter
- Solar Panels Wattage Calculated
- How Many Solar Panels Per Acre?
- How Many Batteries Per Solar Panel?
- Solar Panel Watts per Square Foot
- Solar Panel Output Voltage
- 100-Watt Solar Panel Amps Per Hour
- Calculating Solar Panel Output
- What Size Solar Panel to Charge 12v Battery
- Solar Panel Wiring
- Renogy 150-Watt Solar Panel