

Installing Solar Panels on Van

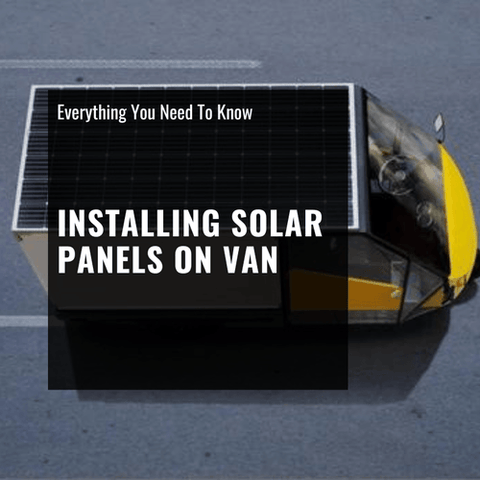
Table of Contents
Short on Time? Here’s The Article Summary
The article discusses the benefits of installing solar panels on camper vans for off-grid electricity and provides guidelines for the installation process. It highlights the importance of calculating power needs, selecting the right components (such as solar panels, charge controllers, batteries, and inverters), and testing components before installation. The article emphasizes purchasing quality products for long-term efficiency and advises against solely focusing on price.
It also distinguishes between PWM and MPPT charge controllers, recommending MPPT for higher efficiency. The installation process involves attaching brackets, testing the fit, measuring and marking drill holes, using reinforcement strips for rigidity, bolting solar panels to the roof, applying sealant to prevent water damage, and wiring the panels together. The article aims to make the installation process less intimidating and offers support for those seeking guidance on solar power setups.
Introduction
If you’re looking to rid yourself of stress and simply get a breath of fresh air, there’s no better way to catch a break than hopping in your camper van, hitting the road, and enjoying a drink under a blanket of stars.
Today you can bask in all the pleasures of nature, whilst still enjoying the luxury of off-grid electricity by installing solar panels on your van. However, if you are installing solar panels for the first time, this can be quite a tricky process.
Fear not though, for we here at Shop Solar Kits have put together a set of guidelines to make this process seem a little less daunting. In this article, we’ll take you through all the pre- and post-installation steps, advising you on the pest hardware to purchase all the way through.
Tips on Getting Started
When you first approach the dilemma of how to set up off-grid solar panels on your van, you may feel intimidated by all the factors you need to consider. As a result, it can be difficult to find a place to start. However, there is no need to worry – this feeling is completely normal.

Here are some preliminary steps that you can follow to ensure you’re starting at the right place.
Calculate Your Power Needs
Before you go about purchasing any pieces of hardware, it’s important that you:
- Determine what you want to power
- Calculate how much power you will need to power these things
The chances are that you’ll need a lot less power than you first imagined, and so if you conduct this analysis correctly you could actually save yourself a lot of time, effort, and, most importantly, money.
Determine the Components You’ll Need
Once you’ve determined how big your solar power system needs to be, you can now decide on the components you’ll need to form part of your system. This will be dealt with in more detail below.
That being said, always remember to purchase any pieces of hardware with the future in mind. When it comes to solar power hardware, we always recommend purchasing products for their quality rather than for their price.
Don’t be fooled by the price of a solar panel. You don’t want to buy a solar panel just because it’s cheaper, because you could end up having to dish out a lot more cash in the future for continued maintenance on a product that was poor quality to begin with.

Test Components
After you’ve purchased your products, be sure to test them and make sure everything is worrying as it should before installing them on your van.
Installing solar panels on a van is a complicated and laborious process. It would be horrible to have gone through the whole process, only to realize that a component isn’t working and have to start it all over again.
Ask Professional for Help if Unsure
We cannot stress this point enough. Never be afraid to contact your solar power hardware provider, or even us here at Shop Solar Kits, for any assistance you may need in relation to your solar power setup.
Which Components Do You Need?
As we mentioned earlier, after you’ve calculated how big your solar power system is going to need to be, you can go about selecting the components that will form part of it.
There are a number of components that are essential to any solar power system that you’ll definitely need to purchase. We have compiled a list of these key components for your below.
Solar Panels
The type of solar panel you choose will be determined by your energy requirements as well as the amount of space you have available to you. Having already dealt with the issue of power requirements we can now focus on the issue of space.
Before purchasing any solar panels, be sure to measure the dimensions of your roof and compare them to the solar panels you’re eyeing. It would be a pity to purchase a solar panel only to realize that it’s too big to be mounted on the roof of your van when it arrives.
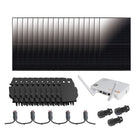
We recommend playing it safe and purchasing a number of Renogy 100 Watt 12 Volt Mono Solar Panels. These panels are perfect for the purposes of roof mounting as they’re not only small, but work together in a single system to achieve phenomenal power output results.

Furthermore, keep in mind that mixing different wattage of solar panels is also a possibility. You don’t have to use only one, or just the same type of solar panel on the roof of your van. All that matters is that your system works for you.
Charge Controller
Essentially, what a charge controller does it to monitor the output of your solar power system. It relays the information to you on its LCD screen and ultimately shuts down your system when your batteries have been fully charged.
Charge controllers are also a simple solution to addressing the dilemma of how to charge multiple batteries with one solar panel. To put it simply, they’re in charge of the relationship between your solar panels and your batteries and so this job is their baby.
We rarely recommend using two charge controllers for one solar panel, simply because it is just unnecessary. There is just no need to have more than one charge controller managing just one solar panel.
There are two basic types of charge controllers for you to choose from: Pulse Width Modulation (PWM) charge controllers and Maximum Power Point Tracking (MPPT) charge controllers.
PWM Charge Controllers
Charge controllers use pulsed width modulation to monitor and control the amount of power that flows to your battery. Current is reduced gradually until the right capacity is met and the current is cut off completely.
This option is less expensive than the modern MPPT charger controllers. However, since they’re older, these types of charge controllers aren’t as advanced as other options on the market.
MPPT Charge Controllers
These charge controllers draw current from your solar panels once their maximum power voltage has been reached. Additionally, they also make sure that the batteries don’t overcharge and lose some of their maximum capacity.

MPPT controllers keep your system’s efficiency at 90% because they constantly monitor and adjust their input to the current they receive from your solar panels.
Although MPPT charge controllers are usually more expensive than MPPT charge controllers, if efficiency is your primary concern, then this is the controller you should go for. They’re a great decision if the space you have to dedicate to solar panels is limited or if you have to struggle with the shade.
Battery
Batteries for solar panels store all the energy gathered by your system from the sun. They’re an essential part of any solar power system as they’ll keep the lights on well after the sun has set.
Here you can generally choose from three types of batteries:
- Absorbent Glass Mat (AGM) Batteries
- Gel Batteries
- Lithium-Iron-Phosphate Batteries
Each of these types of battery has its own perks and downfalls. However, as we mentioned earlier, always keep long-term investments in mind when purchasing hardware. Therefore, despite the fact that they can be quite pricey, we recommend lithium batteries for you to get the most value for your money.
Inverter
If you want to power your van’s appliances (microwaves, lights, etc.) you’ll need to purchase an inverter as well. Inverters take the DC power produced by your solar panels and convert it into the AC current that your appliances will need to run.
Installing Solar Panels on a Van
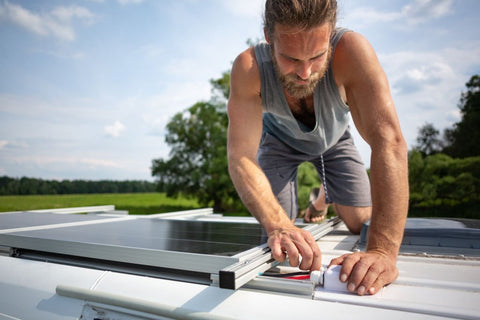
Now that we’ve covered all the components you’ll need to complete a fully-functioning solar power system, let’s take a look at how to go about mounting these solar panels on the roof of your van.
Below, we’ve laid out a number of steps and check you should follow to make this installation process as easy and efficient as possible.
Step 1 – Attach Brackets
The solar panels you buy for roof-mounting purposes usually come with an installation kit. The first step in this installation process is to attach the included brackets to the backs of your solar panels.
Make sure to use the trial-and-error method before attachment to ensure that you have the configuration that works best for your setup.
Step 2 – Test the Fit
Before attaching any of your panels to your roof be sure to test a number of configurations until you find the one that not only looks the neatest but also makes the most of the space you have available t you.
Step 3 – Measure and Mark Drill Holes
Always remember the saying “measure twice, drill once”. Before drilling holes in the roof of your van always check your measurements a number of times before marking the final position of the holes you need to drill.
Step 4 – Reinforcement Strips
Reinforcement strips are used to add some additional rigidity to your setup. We recommend simply using ¾” scrap pieces of plywood in this regard to be fitted into the gaps where the brackets aren’t securing the solar panel to the roof. They are fitted by drilling them into the roof as well.
Step 5 – Bolt Solar Panels
Now that your reinforcement strips have been secured you can bolt your solar panels both to the roof of your van and to these reinforcement strips. The brackets of your solar panel usually have pre-drilled holes exactly for this purpose.

Step 6 – Apply Sealant
Apply the included sealant to the holes you’ve drilled in your roof to ensure that no water enters the roof of your van through these holes. Also completely douse the wooden reinforcements in the sealant or even varnish to ensure that they do not warp from water damage.
Step 7 – Wiring
This is the final step in the process. Once your solar panels are secured to your roof, you can go about wiring them to each other using the instruction manuals that come with the panels.
Upon finishing this process, you’re ready to hit the open road!
Conclusion
Overall, we hope that these guidelines have made the process of installing solar panels on a van seem a lot less daunting. Follow these easy steps and you’ll have your portable solar power system up and running in no time!
Also as we’ve already said, never hesitate to contact us with any solar power-related queries that you might have.
The Ultimate Solar + Storage Blueprint (Mini Course)
Struggling to understand how solar + storage systems actually work? Looking to build or buy your own solar power system one day but not sure what you need? Just looking to learn more about solar, batteries and electricity?
Join 15,000+ solar enthusiasts breaking free from their energy dependence with this short step-by-step video course that will make you a solar + storage expert. Start your journey to energy independence today.

Who is ShopSolar.com?
ShopSolar.com is the #1 digital platform that enables consumers & businesses to source and purchase complete solar + storage solutions direct, saving you thousands in time, energy and money! With over 40,000+ happy customers, we’re on a mission to make solar simple, transparent and affordable.
Did You Find Our Blog Helpful? Then Consider Checking:
- Sailboat Solar Panel Installation
- What Size Cable For 12v Solar Panel
- How to Charge Lithium-Ion Battery with Solar Panel?
- Solar Panel Positive and Negative
- Solar Panel Setup for Rv
- Portable Rv Solar Panel Kits
- Solar Panels for Van
- How Many Solar Panels to Run a House Off Grid
- Portable Solar Panel for Electric Car
- How Many Solar Panels Can I Fit on My Roof?
- How Many Solar Panels to Charge an Electric Car?
- Solar Panels for Mobile Home
- Solar Panel for TV and Lights
- Emp Proof Solar Panels
- How Durable Are Solar Panels
1 comment
Hi I’m installing lithium batteries to my pretty old Jayco I’m in the process of removing and replacing my 30 amp dc dc charger with solar input the charger is 40 amps my old charger was no solar input a relay was switched off when dc dc change from the car and on when vehicle was parked this worked okay on gem batteries olso I often plugged in one sometimes two folding panels with separate mpt not expensive controllers the system seemed to work I’m not sure how efficient put got us there in the van I’m replacing the agm 240 amph with 300 amph lithium can I run all these solar inputs through one controller in the dc dc charger,
Also,I’m replacing the 120amph agm with 100 amph lithium in car charged by sola blanket will i have to charge my mpt controller to a controller to suit lithium can’t find much information about sola controller or if I require one to work with lithium, please reply as your experience and knowledge will be greatly appreciated thanks Mark