

Sailboat Solar Panel Installation Guide


Table of Contents
Short on Time? Here’s The Article Summary
The article discusses the growing trend of installing solar panels on boats, highlighting their effectiveness, affordability, and environmental friendliness. It provides a guide for installing solar panels on a boat, including factors to consider, such as panel size and type, positioning, mounting locations, wiring, choosing a charge controller, and maintenance.
Solar panels on boats are beneficial for powering various systems like appliances, autopilots, navigation lights, and radio systems, reducing the risk of battery failure in remote areas. The article recommends using flexible or semi-flexible panels for certain installations due to their adaptability to curved surfaces. Proper wiring, using weatherproof materials, and choosing the right charge controller (PWM or MPPT) are crucial for optimal performance. Regular maintenance, including cleaning and monitoring power output, is essential for longevity and efficiency. The article aims to simplify the installation process and ensure that boat owners can harness solar power effectively for their maritime adventures.
Introduction
In recent years, the concept of solar energy has taken the world and, specifically, the maritime industry by storm.
Installing solar panels on a boat has become common practice within the maritime community as solar panels charge your boat’s batteries in little to no time thanks to the amount of sunlight they enjoy. Not only are solar panels both effective and affordable, but they’re an environmentally-friendly alternative source of power.
In this article, we guide you through the process of installing solar panels on a boat, providing you with a checklist of all the factors you’ll need to consider to ensure that your solar panels have the highest power output possible
Using Solar Panels for Maritime Purposes
Before we dive into the intricacies of the installation process, it’s important that we take a quick look at why you should install solar panels on your sailboat as well as how to determine which solar panels to use.

Why is Solar Power Useful on a Sailboat?
When it comes to sailboats, a common misconception is that the only energy that sailboats use is the kinetic energy of the wind to move it forward.
This is obviously not true because there are a number of systems on a sailboat that all require battery power. Some of the things requiring electrical power include:
- The rotor for when there is no wind to propel the sailboat forward
- The autopilot feature on newer, more advanced sailboats
- Navigation lights
- Radio systems
For this reason, most sailboats also have built-in batteries to power all these systems. It is here where the usefulness of solar power comes into play.
By installing solar panels on your sailboat and connecting them to this battery, you’ll be able to recharge the battery of your sailboat using sunlight on a daily basis. This means that you’ll never run the risk of ending up in the middle of the ocean and at the will of a flat battery.
Choosing the Right Solar Panel
As you’ll see further below, choosing the correct solar panel for your purposes will be determined by a number of factors.
You’ll determine the size of the solar panels you used based on the amount of space you have available to you for the purposes of solar panel installation. The size of your sailboat is obviously a major determining factor in this regard.
Looking at the power requirements of your specific sailboat will also help you determine how many and which type of solar panel will be the best to satisfy the power needs of your sailboat.

Finally, the specific form of solar panel you’ll need to use will depend on where you intend to install your solar panels. As we’ll discuss later, on some occasions rigid solar panels will be the best panels for the job, but on other occasions you might find that flexible or semi-flexible solar panels are required for the specific installation site.
Installing Solar Panels on a Boat
When it comes to addressing how to install solar panels off-grid on your sailboat, you’ll find that the process is one that has the potential to be rather lengthy and, sometimes even, tricky. For this reason we’ve put together a set of guidelines that should help you navigate these turbulent waters.
Mounting
The first hurdle you’ll encounter when starting the process of mounting a solar panel on your sailboat is finding somewhere to mount it. This is because the decks of sailboats are not necessarily the most ideal of surfaces upon which to install your solar panels.
That being said, there are a number of commonly used areas that we would recommend you look at as your points of departure.

Arches or Gantry Aft
The first place we recommend positioning your solar panel is on one of the arches of your sailboat or on the gantry aft.
The effectiveness of this position is usually enhanced by the additional construction of an adjuster of sorts that’ll allow you to position your panel so that it receives as much sunlight as possible.
Cockpit Sprayhood or Bimini
This is generally regarded as the second most popular location in which to mount your solar panel.
For this location, we recommend using a flexible or, at least, semi-flexible solar panel instead of a rigid one.
The flexible solar panel we recommend in this regard is the Inergy Linx 100 Watt Flexible Solar Panel which is just one of the multiple solar panels of this type that we have in our immaculate inventory here at Shop Solar Kits.

Lifelines
The third alternative to the above two locations would be mounting your solar panel on the lifelines running alongside the cockpit. Here you would need to make use of the available installation kits that will allow you to turn and angle the panels manually to a limited extent.
Deck
Finally, the deck is also a commonly used location for the installation and mounting of solar panels on a sailboat.
Here you will need to consider the size and gradient of your deck. If you have a curved deck, you will once again need to make use of flexible or semi-flexible solar panels instead of rigid glass-coated panels.
Positioning Your Solar Panel
This link in the installation chain follows the above considerations that need to be made prior to mounting your solar panels.
When considering the location where your solar panels are going to be installed, you not only need to choose a location that offers the most available space for solar panel installation, but that is also the most practical for solar panel installation.
The two considerations that you need to bear in mind in this regard are shading and overheating

Shading
One of the most important principles to remember when deciding on a surface on which to install your solar panels is to stay away from shade.
You want to position your solar panel in a position that receives as much sunlight as possible as this will in turn guarantee that your solar panel produces as much power as possible. That being said, sometimes the shade that is thrown by the boom, mast, or sails simply can’t be avoided.
For this reason, you want to ensure that you purchase high-quality solar panels. Modern solar panels are much less sensitive to partial shading as each of their solar cells is isolated from one another by one-way electric valves.
Therefore, if a couple of cells are shaded, they won’t have a negative impact on all the other non-shaded cells in the rest of the panel.
Overheating
If your solar panel overheats, it’ll take a massive knock to its overall power output.
To prevent this you’ll need to ensure that your solar panel has sufficient air circulation behind it, especially if it's installed on a flat surface like the deck.
With regards to these latter flat installations, you want to mount the panel to the deck with large dabs of mastic adhesive to promote better air circulation around the solar panel.
Wiring Your Solar Panels

This step in the installation process addresses one of the most frequently asked questions by people installing solar panels on their boat for the first time: should they be wired in series or in parallel.
The answer to this question ties in with the issue of shading that was dealt with above. If shading is one of your largest concerns, you’ll want to have your solar panels wired in parallel and not in series.
You might remember from your early high school science classes that if the light bulbs in an electric circuit are connected in series, if one of the bulbs fails, all the other bulbs connected in series will also fail.
The same principle applies to solar panels. Firstly, if your solar panels are connected to each other in series, if one solar panel suffers any damage and becomes defective as a result, the rest of your solar panels will be affected negatively as well.
Similarly, if one of your solar panels is in the shade for more time than the rest of your solar panels, all of your solar panels’ productivity will be negatively impacted too.
However, if your solar panels are connected in parallel to each other, the malfunctioning or shading of one panel will not affect the overall power output of your other solar panels.
Cabling and Connector Considerations
In this regard, there are two factors that you will need to consider: cable thickness, and cable and connector durability.
Thickness
If you do not use the corrected sized wiring for your system, you’ll experience a significant reduction in the overall power output of your solar power system.
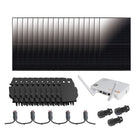
![56.8kW Solar Power System - 6 x Sol-Ark 15K's + [142.8kWh Lithium Battery Bank] 144 x 395W Solar Panels | Complete Solar Power System [ISK-MAX] - ShopSolar.com](https://cdn.shopify.com/s/files/1/0034/8913/6751/files/Cabling_00d8bacb-53bb-4a42-adba-ca089b112119.png?v=1699454799)
The thickness of the wire you’ll need to use is determined by how you want to wire your solar panels – in series or in parallel. If the former is your setup of choice we recommend using a thinner-gauge wire due to the fact that here, the voltage of the circuit is additive whilst the current flowing through it remains constant.
Conversely, if you want to wire your solar panels in parallel you’ll need to use a thicker-gauge wire due to the fact that here, the current flowing through the circuit is additive whereas the voltage remains constant.
This process is, however, slightly more complicated if you plan on mixing different wattage solar panels in your system. For this reason, it is important that you thoroughly calculate the voltage and current flowing through your circuit to ensure that you employ the correct use of wiring for your circuit.
Durability
Upon deciding on the thickness of the wiring you’ll be using, ensure that you use wiring that is weatherproof (meaning that it is exterior-grade wiring that is double insulated and UV-proof) as well as weatherproof connectors.
Failing to do this, you run a much higher risk of your circuit malfunctioning due to water or weather damage. By ensuring that your cables are highly-durable you’ll save yourself a lot of time, money, and effort in the long run.
Choosing a Charge Controller

Choosing the right charge controller for the size of the system you want to install is also an essential consideration in the process of installing solar panels on your sailboat.
The purpose of a charge controller is essentially just to disconnect your solar panels from your battery when it is fully charged. It’s also the solution to the dilemma of how to charge multiple batteries with one solar panel because, as its primary purpose is the managing of the charging of batteries.
That being said, we don’t recommend a setup using two charge controllers and one solar panel. This is because, to put it simply, it’s just unnecessary.
One charge controller is more than sufficient to monitor the functioning of a single solar panel. The same isn’t true for multiple solar panels, however, where more than one charge controller could be useful where many solar panels are used.
There are generally two types of charge controllers for you to choose from: PWM (pulse width modulation) controllers; and MPPT (Maximum Power Point Tracking) controllers.
PWM Controllers
These are a fairly simple and inexpensive alternative to the more expensive and complicated MPPT controllers.
That being said, although these are much cheaper than MPPT controllers, they are also considered to be rather primitive in comparison with MPPT controllers.
MPPT Controllers
These controllers are much more advanced than PWM controllers.
They allow you to achieve the optimum power output of your solar system by constantly tracking and logging the troughs and peaks of your system’s productivity and adapting the output of the system to the batteries you’re using and the condition they’re in.
This is the charge controller we would recommend because it allows you to harvest up to 25% more usable power from your solar power system.
A good charge controller is an invaluable piece of equipment for your solar panel setup. It’s crucial for so much more than just a boat. You also need a charge controller if you want to install solar panels on your van or RV.

Maintenance and General Upkeep
It’s common knowledge that the installation of solar panels can be quite a pricey affair. It is for this reason that solar pane enthusiasts are constantly talking about the “break-even point”. This is the point at which your solar panel has saved you so much money that it has effectively paid itself off.
The average solar panel tends to reach this point within 5-7 years. However, this point can be significantly delayed and postponed if your solar panel isn’t properly maintained.
Maintenance includes the regular cleaning of your solar panel and carefully inspecting them for any signs of damage.
It is also essential that you monitor the monthly or even weekly power output of your solar power system. We recommend addressing any discrepancies in this regard as soon as possible after picking up on them.
Never hesitate to consult your solar panel provider with any queries regarding the performance of your solar panel and never hesitate to contact our experienced employees here at Shop Solar Kits for tips or guidance regarding your solar power needs.
Conclusion
Overall, we hope that this article has made the sailboat solar panel installation process seem a lot less intimidating and that our guidelines serve to steer you in the right direction.
By following these steps and paying close attention to the considerations we’ve covered today, you’ll definitely be able to sail through these turbulent waters with ease and have your system running to its fullest potential within no time.
The Ultimate Solar + Storage Blueprint (Mini Course)
Struggling to understand how solar + storage systems actually work? Looking to build or buy your own solar power system one day but not sure what you need? Just looking to learn more about solar, batteries and electricity?
Join 15,000+ solar enthusiasts breaking free from their energy dependence with this short step-by-step video course that will make you a solar + storage expert. Start your journey to energy independence today.

Who is ShopSolar.com?
ShopSolar.com is the #1 digital platform that enables consumers & businesses to source and purchase complete solar + storage solutions direct, saving you thousands in time, energy and money! With over 40,000+ happy customers, we’re on a mission to make solar simple, transparent and affordable.
Did You Find Our Blog Helpful? Then Consider Checking:
- What Size Cable for 12v Solar Panel
- How to Charge Lithium-Ion Battery with Solar Panel?
- Solar Panel Positive and Negative
- Solar Panel Setup for RV
- Solar Panels for Van
- How Many Solar Panels Do I Need for My RV
- How Many Solar Panels to Run a House Off Grid
- Portable Solar Panel for Electric Car
- Solar Panels for Campers
- Why Are Solar Panels Good
- Solar Panel Maintenance
- How Many Solar Panels to Charge an Electric Car?
- Solar Panels for Mobile Home
- Solar Panel for TV and Lights
- Are Solar Panels Waterproof