

How To Install 100 Watt Solar Panel - A Complete Guide


Table of Contents
Short on Time? Here’s The Article Summary
The article discusses the benefits of using solar power to reduce carbon footprint and provides a step-by-step guide on how to install a 100-watt solar panel. It emphasizes starting small with solar power and gradually adding more panels if needed. Key steps include measuring the roof, positioning and mounting the solar panel, adding extension cables, running cables into the RV, placing the charge controller and inverter, and connecting the solar system. It also explains the tools and supplies needed for the installation process.
The article concludes by highlighting the power output of a 100-watt solar panel, mentioning that it can run small devices like phones, lamps, fans, WiFi routers, and laptops. It suggests that while a 100-watt solar panel may not provide much power for larger appliances, it is a good starting point for beginners to understand how solar systems work and determine their future solar power needs.
Introduction
Using solar power can make a huge difference to your carbon footprint. Solar power is clean, reusable, and reliable energy.
Learning how to install a 100-watt solar panel is not all that difficult. In fact, with a DIY solar kit, it can be quite easy.
If you are trying out solar power for the first time, starting small is a good idea. Once you have the 100-watt solar installed, you can always add more.
Continue reading for a step-by-step guide on how to install a 100-watt solar panel.

Installing a 100-Watt Solar Panel
When installing a solar panel, it is ideal to work in a bare-bones RV. This is because you will need to run the cables through the roof, walls, and/or floor. It would be easier if there was nothing in the way.
If you are working in a fully-fitted RV, you will need to carefully plan ahead. Remember to fix any holes you make once you are done.
Before You Start
Before you buy the solar panel, you first need to measure the roof. You need to make sure that there is enough space to place a solar panel.
A 100-watt panel is 47 x 21.3 x 1.4 inches. You can find the 100-watt solar panel specifications at the back of the panel.
Chances are good that you will want to add more panels in the future. When deciding where to mount the solar panel, make sure there is space for more.
We won’t be discussing how to connect multiple solar panels here. But feel free to look at our article on how to connect 2 100-watt solar panels.
Next, figure out where you are going to run the cables into the RV. A vent would be the best option because you want to avoid drilling into the roof. Then you will need to decide where you are going to drill inside the RV.
You won’t be able to avoid drilling completely. Once the cables are in the wall, you will need to drill a hole to get it into the main cabin.
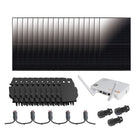
Make sure that you have all your tools and supplies at hand. You can buy a single 100-watt solar panel, or you can buy a complete kit.
Some kits have everything, including all cables and brackets. The only things you might need to buy separately are heat shrink and terminal eyes.
It is always good practice to check what is included in the kit before you buy it.
Tools/supplies needed
- 100W solar panel
- 100ah battery
- Charge controller
- Inverter
- Two #10 gauge wires (red and black)
- Two #10 gauge extension cables (red and black)
- Four Z mounting brackets
- Two MC4 connectors
- Two fuses and fuse holders
- Terminal eyes
- Red and black heat shrink
- Drill and drill bits
- Pliers
- Screwdrivers (an assorted selection, just in case)
- Adhesive (Sikaflex 221)
- Gland seal
- Socket wrench
- Multimeter

Step 1: Positioning and Mounting the Solar Panel
As we said above, when choosing where to put the solar panel, make sure there is room enough for more.
Once you have positioned the panel, attach the Z brackets to it. Before mounting it to the roof, add adhesive between the brackets and the roof. This gives it extra stability.
Screw the brackets to the roof and cover the top of the screws with adhesive to prevent rust. The adhesive should take about 24-hours to set if there is no rain.
Step 2: Adding Extension Cables
Solar panels have about 1-meter cables attached to them. You will need to measure how much more you need and attach extension cables.
You need enough cable to run from the solar panel to the charge controller. It is always best to overestimate
Remember to attach the cables negative to negative and positive to positive.
The cables on the panels will be labeled with “negative” or “positive”. If they do not have these labels, the positive cable usually has a red ring at the end.
You will need two MC4 connectors for the extension cables. These connectors are designed to cope with the current from a solar panel. They are also weather-proofed to prevent damage from the elements.
When buying extension cables, try to get one black and one red. This will prevent confusion when running the cables down into the RV. If you can’t get a red one, put a red heat shrink on the positive cable.
Step 3: Running the Cables into the RV
This part is tricky if you have a fully-fitted RV. First, you need to decide where to run the cables through the roof. An air vent is a good option since you won’t need to drill into the roof.
Once it is in the vent, you will have to pull the cables down. To do this, you need to get into the wall from the outside panel. This panel houses the wiring for most of the RV. You might need a long hook or hanger to reach up and grab the solar panel cables.
From there you will need to drill to get the cables into the main area. Make sure that there is enough open space on the other side before you drill. You do not want to accidentally damage anything.
You can now push the cables through to the main cabin.
Step 4: Placing the Charge Controller and Inverter
You can now mount the charge controller and inverter. You should already have an idea of where you will place them. They should be within easy reach of the solar panel cables. You do not want to strain the cables when connecting everything.
It is best to mount the charge controller and inverter to a cupboard for stability. Do not drill into the RV wall if you can avoid it.
Be sure to place the battery nearby but out of the way as well. You will be connecting the solar system once everything is in place.

Step 5: Connecting the Solar System
The solar panels, inverter, and charge controller are in place. It’s time to connect your solar system.
Setting up the solar system might seem complicated but it’s not. It’s easy to get confused if there are too many components involved.
First, prepare your gauge wires. Are you wondering what gauge wire is needed for a 100-watt solar panel? You need 10AWG gauge wires for a 100W panel.
The charge controller and inverter should each have a set of positive and negative wires.
Strip both ends of the wires and attach the terminal eye to one side. This is the end that will go on the battery.
Use pliers to compress the terminal eye on the end and then cover the connection point with heat shrink. The heat shrink ensures the terminal eye stays put.
On the other end, twist the exposed copper to a point. You can now attach the wires.
5.1: The Charge Controller
Let’s do the charge controller first. You need to know what size charge controller you need for a 100W solar panel. Consider a 20A MPPT charge controller if you plan on increasing the solar later on.
The charge controller has 3 different outputs: solar panel, battery, and DC load.
You will be attaching the exposed copper section of the wire to the battery outputs. Use a screwdriver to loosen the screws, insert the wire and tighten the screws again.
This is where color-coded wires come in handy. Red for positive and black for negative. If you don’t have red then add some red heat shrink to the positive wire.
Always attach the negative wires first. The positive wire will need a fuse attachment and fuse. This is a failsafe.
If too much current passes through the charge controller, the fuse will blow. This failsafe ensures the battery won't get damaged.

5.2: The Inverter
Repeat the above process with the inverter.
Insert the exposed copper end and tighten the screws. You will need a fuse attachment and fuse for the positive line of the inverter.
It serves the same purpose as the charge controller. But in this case, it protects your appliances from overloading.
What size inverter do you need for a 100-watt solar panel? Our 100-watt kit comes with a 2000W 12V inverter. You can buy a smaller one, but it’s better to leave room to scale up.
5.3: The Battery
The wires are now attached to the inverter and charge controller. Now, take the negative wires of both the inverter and the charge controller. Place them on the negative terminal on the battery and tighten it.
Do the same with the positive wires and the positive terminal.
The charger controller should switch on immediately. The display screen will give you information about the battery. The solar panel information won’t show until it is connected.
Switch on the inverter to ensure everything is working. The light should be green if the battery works. If there is a problem with the battery, there will be a red light and beeping.
You can switch the inverter off again for the time being.
What size battery do you need for a 100-watt solar panel? One 100Ah AGM will work. Or you could buy more and have a battery bank instead.
5.4: Solar Panel
You can now attach the solar panel cables to the charge controller. You should get an immediate readout on the charge controller.
You can use a multimeter to ensure that you connected everything right. This will show you if the negative and positive currents are correct.
Step 6: Test it
Once everything is set up, you can switch the inverter back on. Grab a small appliance, like a fan or small lamp, and plug it in to test if everything is working.
You should turn it off again. Remember that this is only a 100W solar system. You will need to use the power sparingly unless you add more solar panels.
The battery is to ensure that you will have adequate power during nights and bad weather. Try not to use the battery unless necessary.
Step 7: Plug Any Holes
Congratulations! Your solar system is now installed and working correctly.
We added a gland seal to the list of supplies above. This is to close up any holes you might have made during installation.
You do not want a small hole turning into a big problem in the future.

Power Output: What Can You Power with 100-Watt Solar?
So, you have your 100-watt solar system. But what can you do with 100-watts of solar power?
A 100-watts can run small devices like phones, lamps, and electric or ceiling fans. You can also power your WiFi router and laptop without any problems.
If you want to power a TV, air conditioning, or a refrigerator, you are going to need more solar.
In optimal conditions, it will draw 100W from the inverter for up to 4-hours. A 100Ah battery should give you up to 10-hours of usage once fully charged. If you have two batteries, you will get double that.
Experienced boondockers will have a battery bank of 3 or more batteries. They might also have a generator for high-drain appliances and emergencies.
It will take between 5 to 8-hours for the solar panel to fully charge a 100Ah battery. If you only have one battery it should be enough to get you through the night if used sparingly.
Is a 100-Watt Solar Panel for You?
A 100-watt solar panel won't give you much power other than for small appliances. But it is a good place to start your solar system.
It will allow you to get an idea of how a solar system works. You can then determine how much solar power you will need in the long run.
100w solar is easy for beginners to set up and install. You don’t need any specialized training and it won’t take long.
That makes this solar panel ideal if you’re new to the world of solar power.
The Ultimate Solar + Storage Blueprint (Mini Course)
Struggling to understand how solar + storage systems actually work? Looking to build or buy your own solar power system one day but not sure what you need? Just looking to learn more about solar, batteries and electricity?
Join 15,000+ solar enthusiasts breaking free from their energy dependence with this short step-by-step video course that will make you a solar + storage expert. Start your journey to energy independence today.

Who is ShopSolar.com?
ShopSolar.com is the #1 digital platform that enables consumers & businesses to source and purchase complete solar + storage solutions direct, saving you thousands in time, energy and money! With over 40,000+ happy customers, we’re on a mission to make solar simple, transparent and affordable.
Did you find our blog helpful? Then consider checking:
- Top 4 Portable Solar Panels
- 300 Watt Solar Panels
- 500 Watt Solar Panel System
- DIY Solar Panel System Installation Guide
- 1000 Watt Solar Panel Systems
- What Equipment You Need for a Complete Solar Panel System?
- 60-Cell vs 72-Cell Solar Panels
- How Long Do Solar Panels Last?
- Top 4 Grid-Tie Inverters Definitive Buyer's Guide