

DIY Solar Panel System Installation Guide: Step by Step


Table of Contents
Short on Time? Here’s The Article Summary
Introduction
Are you interested in setting up your own solar panel installation? Great! We’re here to help. We’ve created this quick guide for DIY solar basics to help you go solar!
Step 1: Make a Plan
Take a deep breath, it’s time to plan your DIY solar system. What do you need electricity for? The first step to any DIY solar panel installation is calculating your electricity demand. For grid-tie home solar panels, take a look at your electricity bills. You can design your system to meet your average monthly kilowatt hour consumption. If you are building an off-grid diy solar panel system for your cabin, boat, van, or RV solar panels, feel free to use our off grid solar load calculator. Also consider checking another blog - Is My Roof Good for Solar?
Step 2: Design the DIY Solar System
Once you know how much solar electricity you will need, the next step is picking the specific components for your DIY solar panel installation.
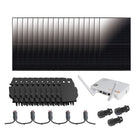
The Components you will need:
- Solar Panel (s)
- Inverter
- Wiring/Cables & Connectors
- Mounting Materials
The parts you may need:
- Net Metering Box (for grid-tied systems)
- Battery & Charge Controller (for off-grid or hybrid systems)
- Protection Material (such as critter guard)
If you are building a grid-tie solar system, you will need a net metering box (usually supplied by your utility) in order to feed your electricity back to the grid. If you are installing an off grid DIY solar panel system, or one with a storage back-up, you will need a battery bank for solar and a charge controller.
For an example, let’s say you are building a DIY off-grid system to power approximately 720 Watt-hours (Wh) per day.
Choosing Your Solar Panels
Assuming for 4 hours of ideal sunlight per day, the total watt power of your solar panels will need to be around 180 watts (720Wh/4h=180W). Leaving a little bit of wiggle room, a 200 Watt solar panel (or two 100 Watt solar panels) is perfect.
Choosing Your Battery
Most small solar systems have batteries rated at 12V or 24V. Choosing the capacity for your battery is largely up to your budget, so for this basic DIY solar panel installation, we recommend a 12V solar panel 100 Amp hour (Ahr) battery.
Choosing Your Charge Controller
For any battery-backed DIY solar panel system, choosing a PWM charge controller, rather than a MPPT, will be less efficient, but more cost effective. To calculate the proper size for your charge controller, simply divide the solar wattage by the battery voltage. Again, leaving some room for error, in this instance, a 20A charge controller will work well (200W/12V = ~17A).
Choosing Your Inverter
The size of your solar power inverters are largely based upon the amount of power you plan to use at one time. Let’s say you are planning to charge your phone (6W) and laptop (60W) while running a small TV (200W), a fan (100W), and some LED lights (40W). The total wattage of these items is just over 400W. Therefore, a 500W Inverter would work well.
Miscellaneous Parts
Aside from the main components of your solar system, you will need to mount each part and wire connections between the solar panels, charge controller, battery, and inverter. Double check when purchasing materials to see if these parts are included with your purchase or if you will have to buy them separately.
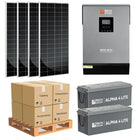
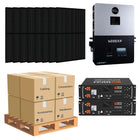
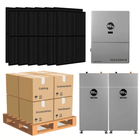
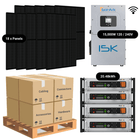
Step 3. Purchase the Materials
Now that you’ve got your shopping list prepared, it’s time to purchase the components of your DIY solar power system. You can buy all of the parts individually, or purchase a solar panel kit . Here, you may find that replacing the inverter, battery and charge controller for your DIY off-grid solar system may be easier or more cost effective.
Step 4. Installing your DIY Solar System
There’s a giant box on your doorstep, which means it’s time to set up your DIY solar panel installation. Always remember to use caution, as electricity can be quite dangerous.
Mounting Your Solar Panels
For mounting solar panels on your roof, various racking options are available. If there is not enough usable space on your roof, consider a ground mounted system. For one or two panel systems, like in our example above, simple options such as screwing into z-brackets will work.
Installing the Other Components
Wherever you choose to mount your system, it is best to keep the components close together to save on potential power loss and minimize room for damage. Most parts of a DIY solar panel system have predrilled holes for easy mounting. Make sure your charge controller is in a visible place, as you will want to monitor the input of your solar power. You will also want to access the inverter to plug in your electronics, though it is important to keep the inverter in a safe area, as it will produce heat while operating.
Wiring Your System
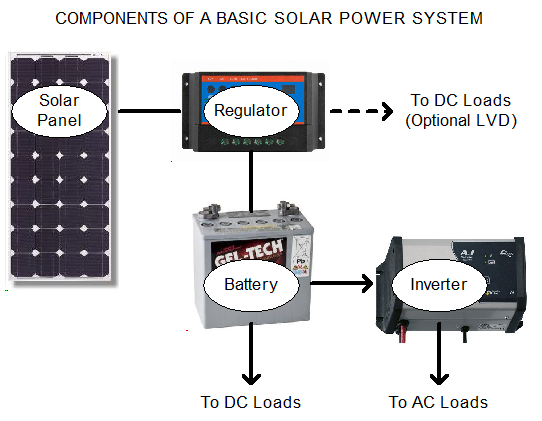
Most solar panels will specify the size of the wire that is best to use. If you are not sure, here is a helpful calculator to determine wire size. If you have multiple solar panels, you will need to connect them in either a series or a parallel connection. As in the image, you will connect the solar panels to the charge controller (regulator), then the battery, then the inverter.
Step 5. Enjoy your Solar Power
We hope this guide provided some insight on how to set up and install a DIY Solar Panel Installation. If you have specific questions on your own DIY solar set-up, consider a free consultation from a DIY solar expert on www.shopsolarkits.com.
If you find it pretty easy and a bit funny and would not mind making a career in the industry, then feel free to check our another article Learn How to Install Solar Panels.
The Ultimate Solar + Storage Blueprint (Mini Course)
Struggling to understand how solar + storage systems actually work? Looking to build or buy your own solar power system one day but not sure what you need? Just looking to learn more about solar, batteries and electricity?
Join 15,000+ solar enthusiasts breaking free from their energy dependence with this short step-by-step video course that will make you a solar + storage expert. Start your journey to energy independence today.

Who is ShopSolar.com?
ShopSolar.com is the #1 digital platform that enables consumers & businesses to source and purchase complete solar + storage solutions direct, saving you thousands in time, energy and money! With over 40,000+ happy customers, we’re on a mission to make solar simple, transparent and affordable.
Did You Find Our Blog Helpful? Then Consider Checking:
- How to Connect a Solar Panel to a 12 Volt Battery
- How to Wire a Solar Panel
- RV solar panel wiring diagram
- Calculating Solar Panel Output
- How To Test Solar Panels
- How Much Energy Does A Solar Panel Produce
- Questions To Ask About Solar Panels
- How To Choose Solar Panels
- Types Of Solar Panels
- How To Make Solar Panels More Efficient
- How Many Solar Panels Do I Need For My Rv
- How Many Solar Panels To Run A House Off Grid
- Solar Panels For Campers