

How to Connect solar Panels to House


Table of Contents
Short on Time? Here’s The Article Summary
This article discusses the process of connecting solar panels to a house, emphasizing the importance of research, planning, and installation. It highlights the complexity of the task but aims to simplify it into three main steps: research, planning, and installation. In the research phase, it suggests calculating your electrical load, drawing up a solar map, and researching available local incentives. It emphasizes the need to determine the size of the solar power system required to cover your energy needs.
The planning phase involves determining the components needed, such as solar panels, batteries, inverters, and charge controllers. It also suggests consulting with solar power installers to ensure a safe and effective installation. The installation phase includes testing the components, mounting the solar panels, positioning them for maximum sunlight exposure, and wiring them to batteries and inverters. It recommends connecting the panels in parallel to avoid power loss in case of damage to a single panel. Overall, the article aims to guide readers through the process of connecting solar panels to their houses, providing tips and advice along the way.
Introduction
We live in an era where sustainable and environmentally-friendly sources of energy are the ways of the future and utility grid-based electricity is the way of the past.
Solar power is one of the most popular of these modern means of energy production and every day more and more households are switching to solar power. Despite its many perks, the process of switching to solar power is one that can be rather complex and so may appear to be quite daunting.
Fear not, however, because we’re here to help you. We want to take you on a brief tour of the process of getting started on your adventure with solar power, focusing specifically on how to connect solar panels to your house.
How to Connect Solar Panels to Your House
As we mentioned earlier, from the outset, the process of switching to solar power and connecting solar panels to your house may seem rather complicated.

However, this process will seem a lot less daunting once we break it down into three distinct steps:
- Research
- Planning
- Installation
So, let’s take a look at each of these three steps separately and, in doing so, delve into the nitty-gritty of how to connect solar panels to your house.
Step 1 – Research
Before you go about purchasing and installing any solar power equipment, it’s essential that you do a bit of research beforehand.
A solar panel system is a hefty investment that initially leaves quite a dent in your wallet, so you want to be certain that you are getting the best bang for your buck straight off the bat.
Below we’ve laid a couple of the things that you need to consider and research before you dive into Step 2 (Planning) and Step 3 (Installation) of the process of connecting solar panels to your house.
Calculate Your Electrical Load
In order to determine the size of the system you need to purchase and install, you need to determine two things:
Firstly, you need to decide whether you want to power your entire home or just a portion of some of your appliances. The larger the portion of the house or the number of appliances you want to power, the larger your system needs to be to produce enough electricity.
Secondly, once you’ve made this initial decision, you need to calculate how much energy you need your solar power system to produce to cover it. This can be done by analyzing the previous past year’s utility bill, specifically your weekly usage.
Simply take your total electricity spend and divide it by 52 to get your average weekly spend. Remember that during the winter months, you tend to use more electricity to keep warm.

Draw Up a Solar Map
Something else that can be particularly helpful when you’re determining how large a solar power system you need to install is drawing up a solar map of your house’s energy production potential.
There are a number of tools and applications that you can use to determine how big your solar power system needs to be. They use satellite images of your home to record and calculate how much sunlight your house receives throughout the day.
Additionally, you can do some research by walking around your house and identifying any objects like trees or other buildings that could cause shade over where you plan to install your panels.
Read Up on Available Local Incentives
It’s always a good idea to find out what the available government incentives you could benefit from if you install solar panels on your home. You can find this out by calling your utility company or simply by doing a Google search of the government incentives available for solar power.
One of the most common incentives that local governments offer is net metering. Net metering allows you to send any extra energy that you’ve produced back onto the grid in return for credit. This credit can then be used to purchase grid electricity to make up for when you aren’t meeting your own needs.
Another well-known government incentive is tax deductions. The US government offers solar power users a tax credit of around 20-30% of the cost of their solar power system. In addition to this, state governments may also have their own unique tax deductions available to solar power users.

Step 2 – Planning
Now that you’ve done all the necessary research regarding the size of the solar power system you need, you can go about planning the type of solar power components and the installation process.
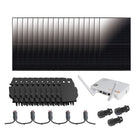
Determine the Components You Need
This step usually requires some more independent research, but we thought we’d save you some time and provide you with a list of the essential components of a solar power system you need.
This list of necessary components includes:
- Solar Panels
- Battery
- Inverter
- Charge Controller
Talk to Solar Power Installers
When it comes to planning how you intend to install your solar panels, we always recommend leaving it to the professionals. This is because the solar polar system is something that’s not only expensive but complicated as well. It’s always safest to leave the installation to someone who actually knows what they’re doing.
Start off the process of determining who will install your solar panels by simply looking for all the certified solar system installers in your area. Following this, we recommend contacting at least three of these installers for quotes so you can compare prices.
Although it’s always best to contact professionals to handle your installation for you, if you’re on a tight budget many of these solar power systems are designed to be simple enough so that you can install them yourself.
Below we’ll guide you through this final step in how to hook up solar panels to the grid.
Step 3 – Installation
If you decide against hiring professionals to install your solar power system for you, the following steps will serve handy in helping you navigate the unchartered water of DIY solar power system installation.

Test Your Components
After you’ve decided on the components that you’ll be using to put together your solar power system and purchase them, an essential step in the installation process is testing each of the components you’ve purchased on their own to ensure that they are functioning as they should.
As we’ve mentioned throughout this article, connecting a solar power system to your house can be a complicated and laborious endeavor. It would be horrible to discover that one of your components is dysfunctional once you’ve finally completed the installation process.
Mounting
This is one of the simplest yet most important steps in the installation process. Most solar panels come with brackets that are drilled into your roof and upon which your solar panels are mounted.
We want to emphasize that it's always important that you measure twice and drill once. Always use a trial-by-error approach to mounting your solar panels.
It’s important to try out a number of different configurations so you can be sure that you have a solar panel configuration that not only looks the best but also works the best for the space you have available to you.
Positioning
When deciding where to position your solar panels, you need to determine which areas of your roof receive the most sunlight and which are more susceptible to shading. This is made significantly easier when you use a solar map and let the experts do the work for you.
In addition to shading, another factor you need to consider regarding the positioning of your solar panels is overheating. If you install your panels in a way that restricts airflow, your panels will overheat and you’ll lose a lot of power output.
Solar panels are especially susceptible to overheating when installed on flat surfaces. Fortunately, the brackets that usually come with your solar panels will help you to position and install your solar panels so that they have enough air circulation to prevent such overheating.

Wiring
The wiring of your solar panels is by far the most complex step in connecting solar panels to your house. This is because you will need to decide whether you want to connect your solar panels in series or in parallel.
When it comes to solar panel connection, we recommend that you connect your solar panels in parallel rather than in series.
This is because, when solar panels are connected in parallel, if one of your solar panels suffers damage and begins to malfunction, it won’t affect the functioning of the other solar panel. In series, such a solar panel disconnect can be detrimental to your overall power output.
Once this decision has been made, you will then need to connect your solar panels to your solar power battery so that all the sunlight they’ve converted into electrical energy during the day can be stored to be used at night.
After you’ve finished connecting solar panels to batteries you just need to hook up your batteries and solar panels to your solar panel inverter and add your charge controller to the system to regulate its performance and you’ll be good to go.

Conclusion
Overall, we’re certain if you follow the steps laid out in this guide on how to connect your solar panels to your house, you’ll have your solar power system up and running in no time.
Also, never hesitate to contact us here at Shop Solar Kits so that one of our experienced employees can help you with any queries you may have regarding solar power components or the installation thereof. We’re always happy to help.
The Ultimate Solar + Storage Blueprint (Mini Course)
Struggling to understand how solar + storage systems actually work? Looking to build or buy your own solar power system one day but not sure what you need? Just looking to learn more about solar, batteries and electricity?
Join 15,000+ solar enthusiasts breaking free from their energy dependence with this short step-by-step video course that will make you a solar + storage expert. Start your journey to energy independence today.

Who is ShopSolar.com?
ShopSolar.com is the #1 digital platform that enables consumers & businesses to source and purchase complete solar + storage solutions direct, saving you thousands in time, energy and money! With over 40,000+ happy customers, we’re on a mission to make solar simple, transparent and affordable.
Did You Find Our Blog Helpful? Then Consider Checking:
- How to Connect a Solar Panel to a Motor
- Can You Hook a Solar Panel Directly to a Battery?
- How Many Solar Panels to Run a House Off Grid
- How Much Do Solar Panels Cost for a 1500 Square Foot House
- How to Heat a Greenhouse with Solar Panels?
- Solar Panels for Tiny Houses
- Selling a House with Solar Panels
- Can Solar Panels Power an Entire House?
- Solar Panels for Home
- Solar Panels for Mobile Home
- Installing Solar Panels on Roof
- How Many Solar Panels Can I Fit on My Roof?
- Best Roof for Solar Panels
- Leaving Solar Panels Disconnected
- Solar Panel Return on Investment